


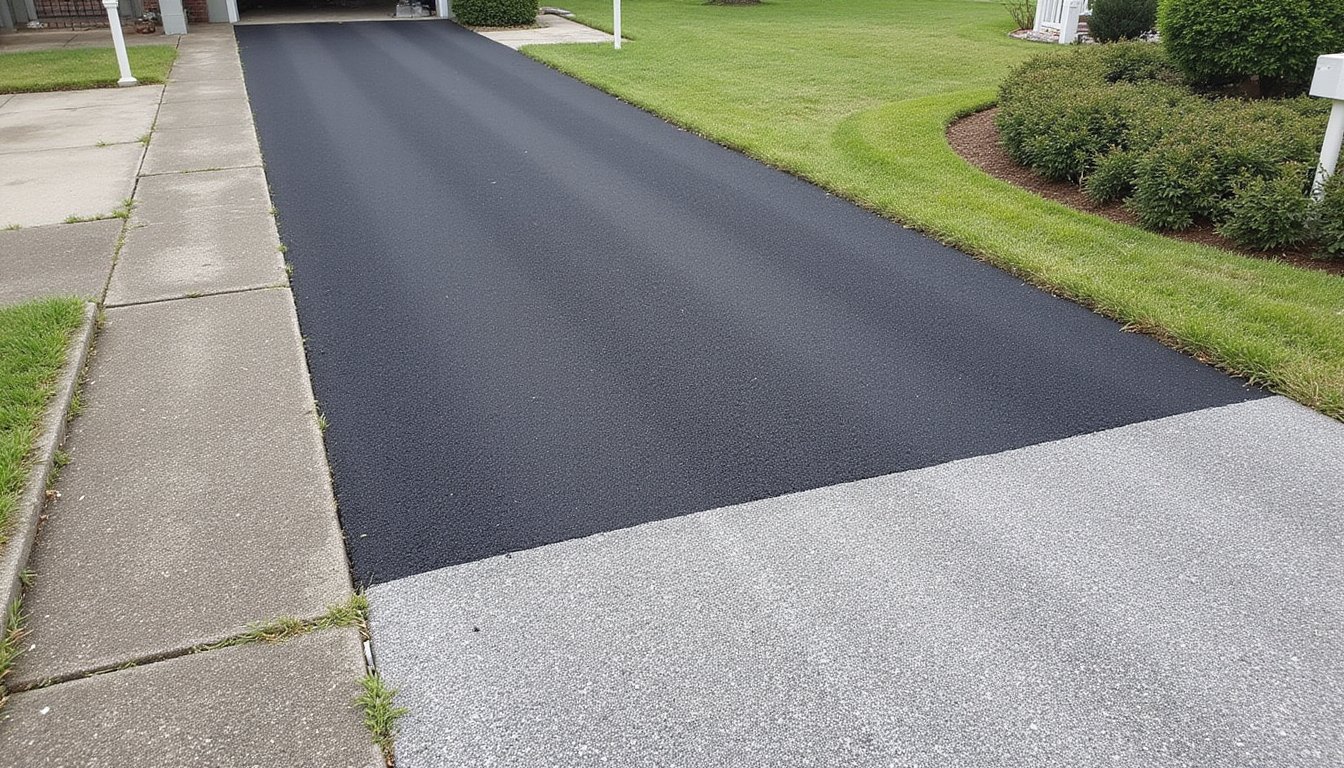
To repair your driveway apron without drainage issues, you’ll need to assess damage and identify root causes, remove failed materials and deteriorated base layers, establish proper drainage before reconstruction, fill voids and prepare a stable foundation, install new material with correct grading, compact the surface for durability, and seal seams while verifying water runoff performance. Each step requires specific techniques, from maintaining 1-2% surface gradients to installing channel drains, that you’ll find detailed in the sections below.
Assess Damage and Identify Root Causes of Apron Failure
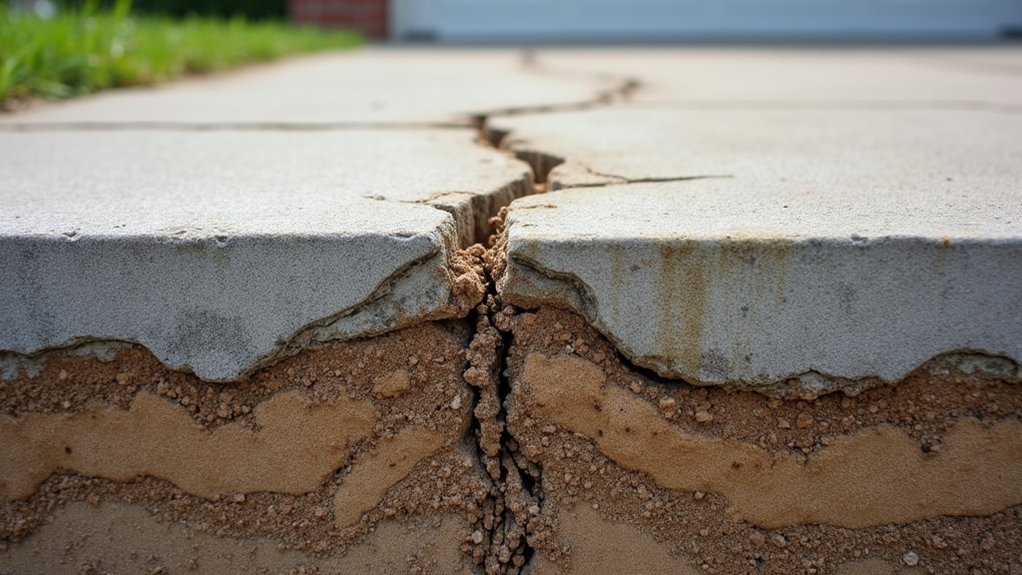
Before you begin any repair work, you’ll need to thoroughly evaluate your driveway apron’s condition and pinpoint exactly what’s causing the deterioration. Check for visible cracking, spalling, settlement, or heaving that indicates underlying structural problems.
Start by examining drainage patterns around the apron. Poor slope design often fails to direct water into the gutter, causing erosion beneath the concrete. You must evaluate existing soil conditions to identify compaction failures or erosion voids that contribute to sinking. Poor soil compaction during the original installation is one of the most common causes of sunken driveway aprons.
Next, determine contributing environmental factors affecting your apron. Look for tree root invasion disrupting soil stability, freeze-thaw cycle damage from water infiltration, or deicing salt deterioration. Document crack patterns, measure settlement depth, and note water pooling locations. This assessment guarantees your repair approach addresses actual failure mechanisms rather than symptoms. If left unaddressed, moisture penetrating under the apron can compromise the integrity of your garage’s foundation through water erosion and settlement. Remember that your apron typically spans 8-15 feet from the street edge, so inspect the entire length for damage patterns that may indicate systemic issues.
Remove Failed Apron Materials and Deteriorated Base Layers
Once you’ve identified the failure mechanisms affecting your driveway apron, you’ll need to remove all compromised materials down to stable subgrade. Begin by excavating the entire concrete slab and clearing all deteriorated fragments from the work area. You must evaluate soil composition beneath the failed base to determine if additional excavation is necessary.
After exposing the subgrade, test bearing capacity to verify the soil can support your new installation. Remove these compromised elements completely:
- Poorly compacted base layers showing displacement or settlement
- Tree roots that have penetrated and lifted the concrete surface
- Unstable aggregate materials damaged by freeze-thaw cycles
Dispose of removed concrete according to local regulations. Clear all vegetation and debris to prepare for proper drainage implementation. Pay close attention to any soil erosion along apron edges, as this indicates inadequate drainage that must be addressed during your replacement project.
Establish Proper Drainage Systems Before Reconstruction
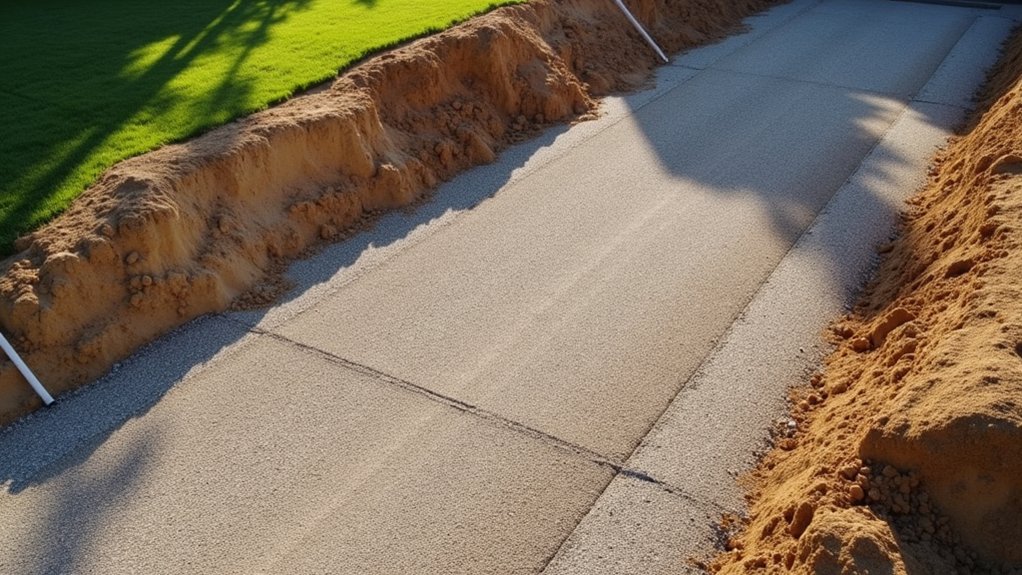
Before reconstructing your driveway apron, you’ll need to address both underground drainage and surface grading to prevent water damage and meet local code requirements. Install channel drains across the apron’s front edge, connecting them to discharge lines that route water away from your garage and foundation. Establish proper slope by maintaining a ½-inch deeper bed than your surface material height, using stakes and mason’s lines to verify consistent pitch toward your drainage outflow points. Since the apron serves as a drainage transition zone between the street and your property, proper water management prevents erosion at the curb and protects adjacent surfaces. Proper drainage is essential to prevent water damage and protect your driveway investment over time.
Install Underground Drainage Solutions
When your driveway apron channels water toward your garage rather than away from it, you’ll need to install a trench drain system before any reconstruction begins. Your trench material considerations include HDPE for lightweight, corrosion-resistant applications or polymer concrete for heavier vehicular loads on steep slopes. Grate selection requirements depend on traffic type, B125 or C250 ratings suit most residential driveways, while D400 handles truck traffic.
Key installation specifications include:
- Excavate trenches with 3-6 inches clearance around channels, compacting crushed gravel beneath
- Set channels at 0.5-1% slope toward outlets, anchoring with rebar stakes or mounting hardware
- Connect drainpipes to approved outlets: storm sewers, dry wells, or rain gardens per local code
Pour concrete backfill flush with your existing driveway surface. A channel width of 4-6 inches provides sufficient capacity for most residential driveway applications. These systems can typically handle 0.5 to 1.0 inches of rainfall per hour, making them effective for managing stormwater during moderate to heavy precipitation events.
Create Proper Surface Grading
Standing water on your driveway apron signals inadequate surface grading that you’ll need to correct before any reconstruction work proceeds. Document existing pooling areas and map slope inconsistencies that prevent water from flowing toward edges.
To maintain optimal incline, implement a 1-2% gradient, approximately 1/4 inch drop per foot, directing water away from structures. Apply crowning techniques with the center raised 5 inches higher than edges on 20-foot-wide surfaces. This gentle slope prevents pooling and erosion that would otherwise compromise your driveway apron over time.
Before resurfacing, excavate 8-12 inches deep and install compacted crushed stone subgrade. Grade from edges toward center using overlapping passes to avoid ridges. This approach will mitigate pooling concerns effectively. Proper grading is especially critical for elevated or steeply sloping driveways to prevent vehicle undercarriage damage when transitioning onto the street. Hiring professionals for this work ensures precision and durability since they bring the expertise and specialized tools needed to identify potential drainage issues a homeowner might overlook.
Finalize by rolling the surface to settle material, then verify smooth conversions between center and edges. Test slope effectiveness by observing water behavior during rainfall.
Fill Voids and Prepare a Stable Foundation
The process of filling voids beneath your driveway apron begins with accurate assessment, you’ll need to drill 3/8-inch pilot holes at suspected problem areas to locate and map cavity networks. Use a borescope camera to inspect injection efficacy and determine void extent, which can range from localized pockets to cavities extending 8 feet or more.
Accurate void mapping through pilot holes and borescope inspection is the foundation of any successful driveway apron repair.
To stabilize subgrade conditions, select your filling material based on void size:
- Polyurethane foam: Sets in 15 minutes, weighs 2 lbs/cubic foot, requires penny-sized holes
- Sand-cement slurry: Cost-effective for smaller DIY applications
- Low-pressure grout injection: Effective at 8-10 psi for larger cavities
Target apex points first, then move injection tubes in 4-5 inch increments to prevent entrapment in hardening material. Polyurethane slab jacking directly addresses the underlying cause of uneven surfaces by filling voids and stabilizing the soil beneath the concrete. Before beginning any repair work, watch for warning signs like hollow sounds when tapping the concrete surface, which indicates void formation beneath the slab. These voids often develop from water undermining the soil and gradually washing away material beneath the footing over time.
Install New Apron Material With Proper Grading Techniques
You’ll need to establish precise slopes that direct water away from your garage while meeting code requirements, aim for a maximum 10% slope from the sidewalk to the curb and no more than 2% across pedestrian walkways. When matching existing materials, set cobblestones to protrude ¼ inch above the driveway surface before compacting, or pour 4-6 inches of reinforced air-entrained concrete for freeze-thaw durability. Use mason’s lines tied between stakes to verify your grades at multiple points, ensuring a ¾-inch drop over 4 feet for proper drainage toward the gutter pan.
Achieve Proper Surface Slope
Something as simple as proper slope can determine whether your driveway apron channels water toward street stormwater systems or pools against your garage foundation. You’ll need to measure grade percentages accurately using 4-foot or 8-foot increments from your baseline stake. Calculate rise per increment, 10 inches over 8 feet maintains consistent drainage flow.
To control apron pitching effectively, keep slopes gentle while ensuring adequate runoff. Target 6% grade within the right-of-way where possible, never exceeding 12% for residential applications. When your apron length reaches 20 feet or more, incorporate a sag vertical curve to prevent abrupt grade changes that could damage vehicles or cause uncomfortable transitions. The grading process involves cutting, filling, and leveling the land to create the proper pitch that directs water away from structures.
- String a mason line between grade stakes to establish a straight reference line
- Mark target elevations on ribbon tied to stakes for precise excavation guidance
- Use a line level with a long 2×4 stake as a cost-effective alternative to laser equipment
Match Existing Driveway Materials
Selecting apron materials that match your existing driveway creates visual continuity while meeting municipal code requirements. Material compatibility guarantees your repair integrates seamlessly with existing infrastructure while maintaining proper drainage function.
| Material | Drainage Consideration | Best Application |
|---|---|---|
| Concrete | Requires slope grading | Standard residential |
| Asphalt | Integrates with infrastructure | Universal compatibility |
| Stamped Concrete | Maintains surface runoff | Aesthetic continuity needs |
You’ll need to verify your chosen material complies with local building authority specifications before installation. Concrete aprons require four-inch thickness for standard use, though heavy vehicle traffic demands increased depth. When you’re matching stamped concrete patterns like slate or flagstone, ensure the texture doesn’t impede water flow toward drainage points. Always prioritize drainage functionality alongside aesthetic continuity goals.
Compact and Finish the Surface for Long-Term Durability
After setting all cobbles in position, you’ll need to compact the surface using a plate compactor to achieve proper settlement into the leveling sand. Mist the cobbles with water before running the compactor to aid material adhesion. You’ll know you’ve achieved verifying compaction completion when you can walk across the surface without leaving footprints.
Focus on ensuring cobble alignment by checking that edges remain flush with the asphalt and street surface. Address any high or low spots by lifting problem areas and adding leveling sand as needed.
- Confirm cobbles sit ¼ inch above the driveway edge to account for final settling
- Check multiple measurement points against reference lines for grade accuracy
- Spot-check the entire surface for drainage slope consistency
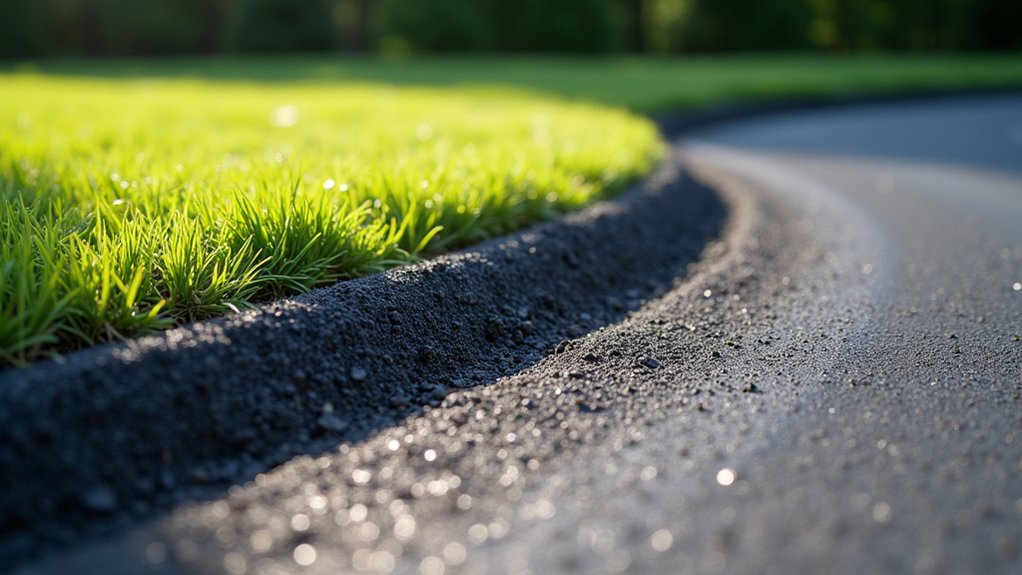
Seal Seams and Verify Proper Water Runoff Performance
The shift zone between your new cobble apron and existing asphalt requires proper sealing to prevent water infiltration and substrate erosion. Select penetrating silane-siloxane sealers, they’ll reduce water absorption without trapping moisture beneath the surface.
Before applying sealer, remove debris with a leaf blower, degrease stained areas, and pressure wash thoroughly. Fill cracks exceeding ¼-inch with appropriate sealant and allow full curing.
| Sealing Techniques | Sealer Application Methods | Curing Timeline |
|---|---|---|
| Mix per manufacturer specs | Apply thin coats from high to low | 24-48 hours drying |
| Use wet-on-wet passes | Spread with squeegee or roller | Foot traffic at 24 hours |
| Back-roll to eliminate puddles | Overlap sections slightly | Vehicle access at 48-72 hours |
Post-application, verify drainage by observing water flow, proper runoff shouldn’t bead or pool at seams.
Frequently Asked Questions
How Long Should I Wait Before Driving on My Newly Repaired Driveway Apron?
You should wait at least 48 hours for asphalt or 7 days for concrete before driving on your newly repaired driveway apron. Curing time varies based on temperature, humidity, and material thickness. Proper preparation guarantees desirable drainage slopes remain intact during the curing process. Don’t drive on the surface until it appears matte, feels non-sticky, and shows no tackiness, this prevents tire marks and protects your repair’s structural integrity and drainage functionality.
Can I Repair My Driveway Apron in Cold Weather or Winter Months?
You can perform temporary fixes during winter months, but you’ll need to ponder materials compatibility carefully. Cold mix asphalt works for interim patching when temperatures drop below 50°F, though it won’t provide permanent drainage solutions. Review local climate conditions before scheduling work, hot asphalt requires minimum 50°F ambient temperatures for proper curing and bonding. For code-compliant, drainage-focused permanent repairs, you should wait until late spring when conditions guarantee ideal compaction and long-term structural integrity.
What Permits Do I Need Before Starting a Driveway Apron Repair Project?
You’ll need a building permit for most driveway apron repairs, though minor fixes under 36 square feet are typically exempt. Check your local building codes first, as requirements vary by municipality. You must submit a site plan showing dimensions, materials, and base depth. Required inspections include a base inspection before pouring and a final inspection upon completion. Guarantee your repair maintains proper curb cuts to prevent drainage system interference.
How Much Does Professional Driveway Apron Repair Typically Cost Compared to DIY?
Professional driveway apron repair typically costs $4, $8 per square foot, with total expenses ranging $1,300, $7,800 including permits and drainage considerations. Your material costs vary by surface type, concrete runs $7, $15 per square foot, while asphalt costs $3, $7. Labor estimates range $50, $150 hourly depending on your region. DIY repairs cost $5, $90 for minor patching, but you’ll sacrifice code compliance and proper drainage grading that professionals guarantee for long-term durability.
Will My Homeowner’s Insurance Cover Driveway Apron Repair or Replacement Costs?
Your homeowner’s insurance typically covers driveway apron repair only when sudden, accidental damage from covered perils, like storms, falling trees, or vandalism, causes the damage. Standard coverage requirements exclude gradual deterioration, drainage-related settling, or maintenance issues like cracks from poor grading. Before starting repairs, you’ll need to document damage thoroughly and initiate the claims process with your insurer. An adjuster will verify the damage qualifies as a covered peril and assess costs against your policy limits.