


Laying asphalt over your concrete driveway cuts costs by 30, 50% compared to full replacement and typically takes just 1, 2 days to complete. You’ll get a smooth, flexible surface that resists cracking and lasts 15, 25 years with proper installation and regular sealcoating every 2, 3 years. The key is confirming your concrete base is structurally sound, no heaving, sinking, or alligator cracking. Below, you’ll find the exact steps, warning signs, and maintenance tips to get this project right.
Why Put Asphalt Over a Concrete Driveway?
When your concrete driveway is structurally sound but visually worn, an asphalt overlay offers a practical alternative to full replacement. You’ll cut costs by 30, 50% since there’s no demolition or subbase work required. Installation typically wraps up in one to two days, minimizing disruption to your daily routine.
An asphalt overlay on a concrete driveway delivers enhanced durability through flexibility that resists cracking, spalling, and pothole formation. You’ll also benefit from lower maintenance demands, crack sealing and sealcoating are straightforward and affordable. DIY application of sealants requires no prior experience, making routine upkeep accessible to any homeowner. The smooth, dark surface improves safety, promotes faster snow melt, and restores curb appeal. With routine upkeep, you can extend your driveway’s functional lifespan to 20+ years while avoiding the expense of full reconstruction. Since seasonal temperature fluctuations can soften asphalt in summer and cause cracking in winter, applying sealcoating after your overlay helps protect the surface against UV rays, moisture, and temperature stress. Keep in mind that an overlay will raise the surface height by at least 1.5 inches, which may affect the clearance of nearby gates, doors, and drainage flow.
Is Your Concrete Base Sound Enough for an Overlay?
Before you commit to an asphalt overlay, you’ll need to confirm your concrete base can actually support one. Check for heaving, sinking, or crumbling, any of these disqualify the slab. Walk the surface and press firm; spongy or soft spots signal subsurface failure. Edges should be intact, not eroded or undermined.
Surface-level cracks, minor flaking, and discoloration won’t compromise asphalt overlay adhesion to concrete driveway surfaces, provided the base remains structurally stable. However, widespread alligator cracking or deep voids require full removal rather than resurfacing.
Hire a professional to evaluate climate exposure, soil stability, and traffic loads before proceeding. Even healthy-looking concrete can hide subsurface deterioration. A compromised base will telegraph cracks directly through your new asphalt, negating the investment entirely.
Warning Signs That Rule Out an Asphalt Overlay
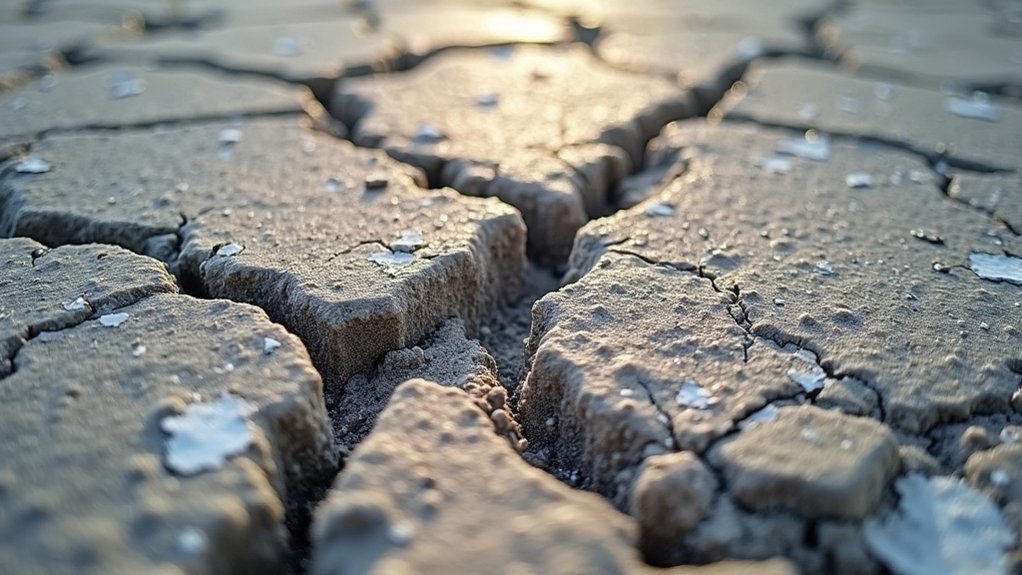
Before you commit to an asphalt overlay, you need to assess whether your concrete base shows failures that make resurfacing impractical. If you’re seeing alligator cracking, those interconnected fractures resembling reptile skin, you’re dealing with a compromised base that can’t support an overlay, since the fatigue damage will propagate directly through any new surface layer. Extensive fatigue cracking signals that the underlying structure has exceeded its load-bearing capacity, and the only effective fix is full-depth removal and reconstruction of the base itself.
Severe Base Structural Failures
Not every concrete driveway qualifies for an asphalt overlay, and recognizing the difference between surface wear and deep structural failure can save you thousands in wasted materials and labor. When potholes multiply after repeated filling, your subbase has deteriorated beyond what any overlay can correct. Sinking sections near your garage or visible gaps between your driveway and adjacent structures confirm underlying erosion or poor installation that demands full replacement.
Before committing to resurfacing, you’ll need professional driveway crack repair before overlay assessment. If vegetation pushes through fractured concrete, roots have already compromised structural integrity. Water ingress causing efflorescence, persistent pooling, or freeze-thaw erosion signals foundation-level damage beneath the slab. These conditions won’t stabilize under new asphalt, they’ll accelerate failure. Full removal and proper subbase reconstruction remain your only viable path forward.
Extensive Fatigue Cracking Present
When interconnected cracks spread across your concrete in a pattern resembling alligator skin or spider webs, you’re looking at fatigue cracking, a structural failure that rules out an asphalt overlay entirely. These cracks originate at the bottom of the pavement where tensile stress peaks, then propagate upward. Attempting asphalt resurfacing over old concrete driveway surfaces with this damage wastes money because the foundation can’t support additional layers.
| Indicator | What It Means |
|---|---|
| Cracks reappear after patching | Moisture has reached the base layer |
| Rapid crack multiplication | Structural capacity is compromised |
| Interconnected web patterns | Foundation failure requires full removal |
Water penetrates these crack networks, eroding the base with every vehicle pass. Temporary patches delay expansion by only months before deterioration resumes. Full removal and base reconstruction remain your only viable solution.
Cracks, Spalling, and Potholes: What an Overlay Can and Can’t Fix
Although an asphalt overlay can restore a worn concrete driveway‘s appearance and function, it won’t solve every problem beneath the surface. Minor surface cracks, cosmetic wear, and shallow imperfections respond well to asphalt paving over existing concrete. You can extend overlay life to 8, 15 years with sealcoating every 2, 3 years.
However, overlays can’t address deep structural failures. Cracks wider than a quarter-inch, potholes, crumbling edges, and extensive heaving indicate base-level problems that require full replacement. Reflective cracking will eventually mirror through the new layer as concrete joints expand and contract, reinforcing fabric helps but won’t eliminate it permanently. Water intrusion beneath the surface signals base compromise no overlay can fix. If your foundation is shifting or your subbase has degraded, a surface application won’t prevent premature failure.
Overlay or Full Replacement: Which Is the Better Deal?
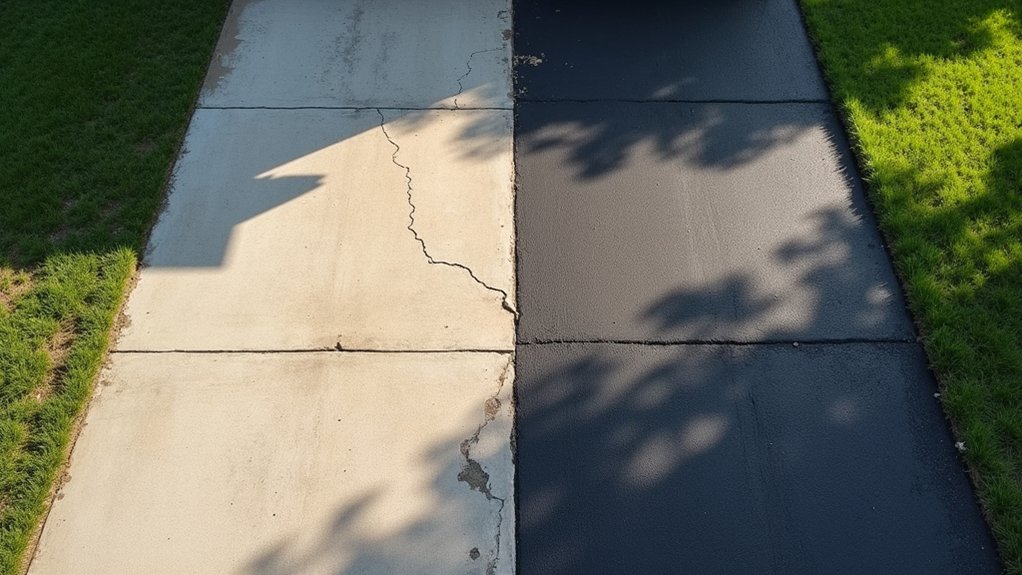
When you’re weighing an asphalt overlay against full driveway replacement, the numbers tell a clear story, overlays run $2 to $7 per square foot, while new asphalt costs $7 to $15 and concrete $8 to $20 per square foot. That upfront savings of up to 50 percent makes overlays attractive, but only if your existing concrete base is structurally sound with no significant settling or deep fractures. If your slab shows base failure, skipping straight to full replacement prevents you from paying twice, once for an overlay that won’t hold and again for the tearout you should’ve done first.
Cost Comparison Breakdown
Two main options define the financial decision behind every aging driveway: applying an asphalt overlay or tearing everything out for a full replacement. Your driveway resurfacing cost asphalt over concrete typically runs $3 to $7 per square foot, putting a 600-square-foot project between $1,800 and $4,200. Full replacement doubles that range to $4,200, $9,000.
Overlays skip excavation, disposal, and base reconstruction, three cost drivers that inflate replacement budgets fast. You’ll also cut labor time considerably since the existing slab serves as your foundation.
However, condition dictates viability. If you’re dealing with extensive cracking, settling, or base failure, an overlay won’t hold. Stable concrete with minor surface deterioration qualifies for overlay treatment, preserving up to 50 percent in savings while extending driveway life 5 to 10 years.
When Replacement Wins
Overlays stretch your budget, but they can’t fix what’s broken underneath. If your concrete driveway shows extensive cracking, uneven settling, or water damage penetrating the base, rehabilitation through asphalt overlay won’t hold. You’re layering over failure, and premature debonding is inevitable.
Full replacement delivers 30, 40+ years of service life compared to an overlay’s 7, 10 years. You’ll eliminate inherited defects, correct drainage issues, and engineer proper joint spacing to prevent future crack propagation. That’s a significant return for long-term ownership.
Replacement also opens up design flexibility, stamped finishes, exposed aggregate, and custom grading that overlays can’t provide. If you’re planning to stay 15+ years, the upfront investment outperforms repeated overlay cycles. When the foundation’s compromised, replacement isn’t just better, it’s the only reliable path forward.
How Much You’ll Save vs. Tearing It All Out
Because an asphalt overlay skips the demolition and hauling costs of full removal, it typically runs 30, 50% cheaper upfront, roughly $2, $5 per square foot compared to $5, $12 for complete replacement. For a 1,000-square-foot driveway, that’s $2,000, $5,000 versus $5,000, $12,000, a significant difference when you’re budgeting for driveway resurfacing asphalt over concrete.
Installation takes just 1, 2 days instead of 3, 5, cutting labor expenses and project disruption. However, you’ll need to factor in long-term costs. Overlays last 8, 15 years versus 20, 30 for replacement, meaning you’ll likely resurface again sooner. Over a 30-year horizon, full concrete replacement delivers approximately 20% total savings by eliminating repeated overlay cycles, resealing intervals, and compounding labor costs.
How an Asphalt Overlay Is Installed Step by Step
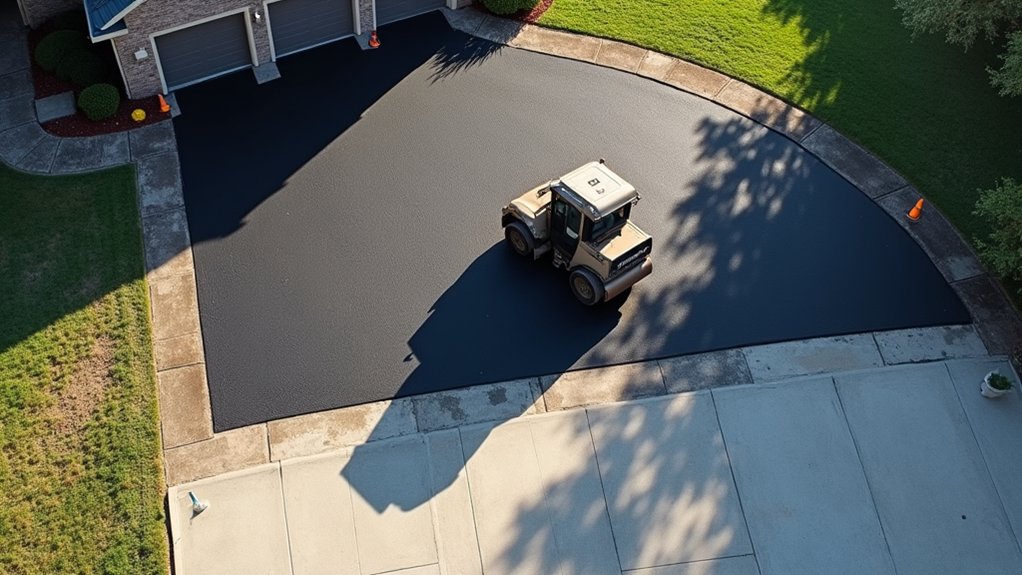
You’ll start by cleaning the existing concrete surface and repairing any potholes or damaged areas to create a stable, even base for the overlay. Once you’ve applied a tack coat to guarantee a strong bond between layers, two to three inches of hot asphalt is spread evenly across the entire surface. The new layer is then compacted using plate compactors or roller trucks until you’ve achieved a smooth, dense finish with no protruding aggregate.
Surface Preparation Steps
Every successful asphalt overlay starts with thorough surface preparation, skip or rush these steps, and you’ll compromise the entire project’s longevity. Among proven driveway surface restoration techniques, cleaning ranks first. You’ll sweep the surface, blow off debris with compressed air, and spot-treat chemical stains like diesel fuel to eliminate bonding contaminants.
| Step | Action | Purpose |
|---|---|---|
| Crack Repair | Fill large cracks with mortar; float and dry 1, 2 days | Prevents reflective cracking |
| Soft Spot Repair | Undercut 2, 3 feet deep; replace with aggregate | Restores structural base |
| Final Cleaning | Rinse surface after repairs; allow to dry | Guarantees tack coat adhesion |
Once repairs cure, you’ll apply primer to the dried concrete, creating the bonding foundation your overlay needs.
Paving And Compaction
Once the tack coat cures to a tacky, non-transferring state, the paving crew spreads 2, 3 inches of hot-mix asphalt over the prepared concrete surface. The paver glides at zero-inch thickness, filling low spots and achieving effective driveway leveling asphalt overlay coverage. Each layer uses specific aggregate sizing, larger stone in the binder course, finer material in the surface course, to maximize strength and ride quality.
After placement, you’ll see the roller truck make multiple passes to compact the material. This step guarantees structural integrity and a smooth finish.
- Spread binder course with large aggregate and oil for load-bearing strength
- Apply surface course with sand-sized aggregate for a smooth, quiet finish
- Compact thin lifts layer by layer to reach 92, 96 percent density
- Complete final rolling to eliminate protruding aggregate and surface irregularities
How Long Does Asphalt Over Concrete Actually Last?
How long an asphalt overlay actually holds up depends on three core variables: installation quality, climate exposure, and traffic load. With proper installation and maintenance, you can expect asphalt overlay durability on a residential driveway to range from 15, 25 years. A solid concrete base gives you a structural advantage over degraded substrates.
| Factor | Poor Condition | Ideal Condition |
|---|---|---|
| Installation Thickness | Thin skim coat: 8, 10 years | 3-inch hot mix: 20, 25 years |
| Climate Exposure | Extreme temperature swings: 10, 15 years | Mild, stable climate: 20, 25 years |
| Traffic Load | Commercial/heavy vehicles: 15, 20 years | Residential use: 20, 25+ years |
You’ll reach the upper range by maintaining proper drainage, filling cracks promptly, and sealing surfaces every 3, 5 years.
Sealcoating and Simple Upkeep That Add Years to Your Overlay
Knowing your overlay’s potential lifespan is one thing, actively protecting it is what gets you there. Sealcoating benefits your asphalt overlay by forming a waterproof barrier that blocks UV rays, chemical spills, and moisture infiltration, all primary causes of binder breakdown and surface cracking.
Apply sealcoat every two to three years to maintain flexibility and prevent oxidation. Between applications, follow these upkeep steps:
- Sweep debris regularly to prevent moisture retention in surface voids.
- Clean oil and chemical spills immediately before they penetrate the binder.
- Fill minor cracks early to stop water from reaching the concrete interface.
- Inspect drainage paths seasonally to guarantee water flows away from the overlay’s edges.
This routine extends pavement life by up to 50% while minimizing costly repairs.
Overlay Failures: Skipping Base Prep and Other Costly Errors
Even when you’ve selected the right materials and scheduled routine sealcoating, your asphalt overlay will fail prematurely if the base preparation was inadequate from the start. Skipping base prep allows water to saturate underlying layers, producing alligator cracking and ruts in wheel paths. Poor bonding from uncleaned surfaces causes slippage cracks, while subgrade instability triggers upheaval and depressions.
Inadequate drainage compounds these issues, standing water forms potholes, and groundwater seepage displaces base materials. Using the wrong mix or insufficient thickness accelerates fatigue cracking under load.
For effective driveway maintenance asphalt overlay performance, you’ll need to address every layer: stabilize the subgrade, guarantee proper drainage, clean all contaminants, and apply the correct overlay thickness. Cutting corners on preparation guarantees costly repairs that exceed the original project budget.
Frequently Asked Questions
Can You Pave Asphalt Over a Concrete Driveway in Cold Weather?
You can pave asphalt over a concrete driveway in cold weather, but you’ll need to take special precautions. Keep ambient temperatures above 40°F and ground temperatures above 50°F for proper adhesion and compaction. Maintain your asphalt mix between 275, 300°F using heaters to prevent premature cooling. Use vibratory rollers and reduce paving speed to achieve adequate density. For major overlay projects, you’re better off waiting for warmer spring or summer conditions.
Does an Asphalt Overlay Affect Your Home’s Resale Value?
Yes, an asphalt overlay can positively impact your home’s resale value. You’ll typically recover 60, 75% of your investment, and a smooth, well-maintained driveway can boost overall property value by 5, 10%. Buyers notice curb appeal, 44% view cracked driveways as major deterrents. A clean asphalt surface signals proper maintenance, helping your home sell 7, 10 days faster while reducing buyer leverage to negotiate a lower price.
How Soon Can You Drive on a New Asphalt Overlay?
You should wait at least 72 hours before driving on your new asphalt overlay. Light foot traffic is generally safe after 24, 48 hours, and the surface reaches about 90% strength within 3, 7 days. Heavy vehicles require a minimum 14-day wait. During the first few months, avoid parking in the same spot daily to prevent depressions. Full curing takes 6, 12 months, so you’ll want to schedule sealcoating after 30 days.
Will an Asphalt Overlay Change the Height of Your Driveway Edge?
Yes, an asphalt overlay will raise your driveway edge by the thickness of the new layer, typically 2″ to 3″. This elevation change can affect drainage and clearance around your garage or walkways. If you’re concerned, you can have the existing surface milled down before the overlay to offset the height increase. You’ll also want to check elevations beforehand to guarantee proper water runoff after installation.
Do You Need a Permit to Overlay Asphalt on a Concrete Driveway?
You may or may not need a permit, it depends on your local building codes. Many jurisdictions exempt like-for-like resurfacing, but adding an asphalt overlay on concrete counts as a material change, which can trigger permit requirements for structural and drainage considerations. Check your city or county building department’s rules, review any HOA or zoning restrictions, and consult a licensed contractor who knows local ordinances to guarantee you’re fully compliant before starting work.