


You can transform your asphalt driveway’s curb appeal through five proven design strategies: install decorative edging with cobblestone or brick to create clear visual boundaries, design curved layouts with 30-foot radiuses for dramatic impact, add contrasting aprons using permeable pavers at entrances, upgrade to stamped or colored asphalt finishes that cost 40, 60% less than authentic materials, and integrate strategic landscaping with native plants and lighting. Each technique addresses both aesthetics and functionality while considerably boosting your property’s value. The following sections detail specific measurements, material selections, and implementation approaches for each strategy.
Create Visual Drama With Decorative Edging and Borders
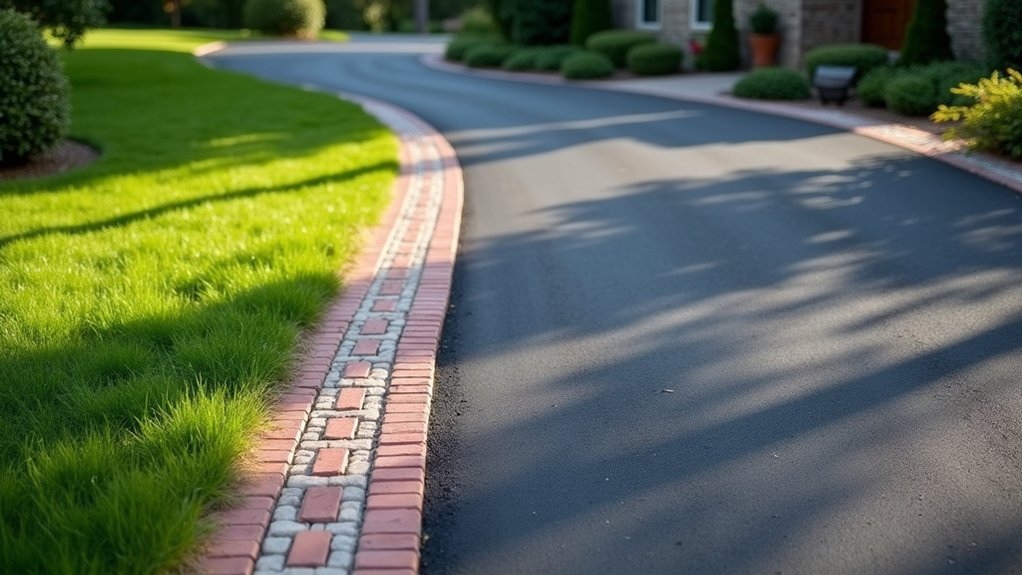
When strategically executed, decorative edging transforms an asphalt driveway from a purely functional surface into a defined architectural element that anchors your property’s exterior design. Highlight border materiality by selecting cobblestone, Belgian block, or brick for maximum durability and visual weight. These materials stabilize the perimeter, preventing crumbling while extending surface lifespan through freeze-thaw cycles. Maximize edge to edge contrast using concrete pavers ($3, $6 per square foot) or aluminum systems like Permaloc AsphaltEdge, which creates precise 90-degree borders. Contrast ratios between dark asphalt and lighter stone establish clear visual boundaries that enhance curb appeal. Integrate gravel beds alongside borders for drainage functionality, or install treated wood for budget-conscious projects. Consider decorative gravel or aggregate materials that complement your home’s exterior palette while maintaining proper drainage channels. L-shaped aluminum restraints install quickly while extending pavement life by preventing broken edges and maintaining uniform asphalt thickness. Experienced driveway contractors can help you select edging materials and colors that seamlessly blend with your home’s architectural style and surrounding landscape. Pair edging with strategic landscape elements, flower beds, shrubs, and lighting to create layered exterior shifts that organize your entrance and guide visitors naturally.
Design a Curved or Circular Driveway Layout for Maximum Impact
Curved and circular driveway layouts deliver immediate architectural sophistication while solving critical circulation challenges on properties with adequate frontage. You’ll need minimum 2,500 square feet and a 30-foot outer radius for functional full-circle designs that enable forward entry and exit, eliminating dangerous reversing onto streets. These configurations can increase property value by 14% while creating dramatic focal points through central landscaped islands.
Asphalt proves ideal for curved applications, flexing through freeze-thaw cycles without cracking when properly installed over compacted base layers. You’ll minimize maintenance requirements by specifying 16-foot entrance widths that prevent edge deterioration from tire wear. The driveway should be wide enough to allow two large vehicles to pass through simultaneously, preventing difficult backing maneuvers. Strategic grading and catch basins integrate functional drainage along curves, directing runoff away from the home while permeable pavers at borders enhance percolation and visual contrast against dark asphalt surfaces. Asphalt’s flexibility makes it particularly suitable for northern climates where temperature fluctuations would compromise rigid paving materials. Low-maintenance, climate-appropriate plants along driveway borders add essential color and texture that complement the flowing asphalt lines.
Add Depth With Contrasting Aprons and Parking Pads
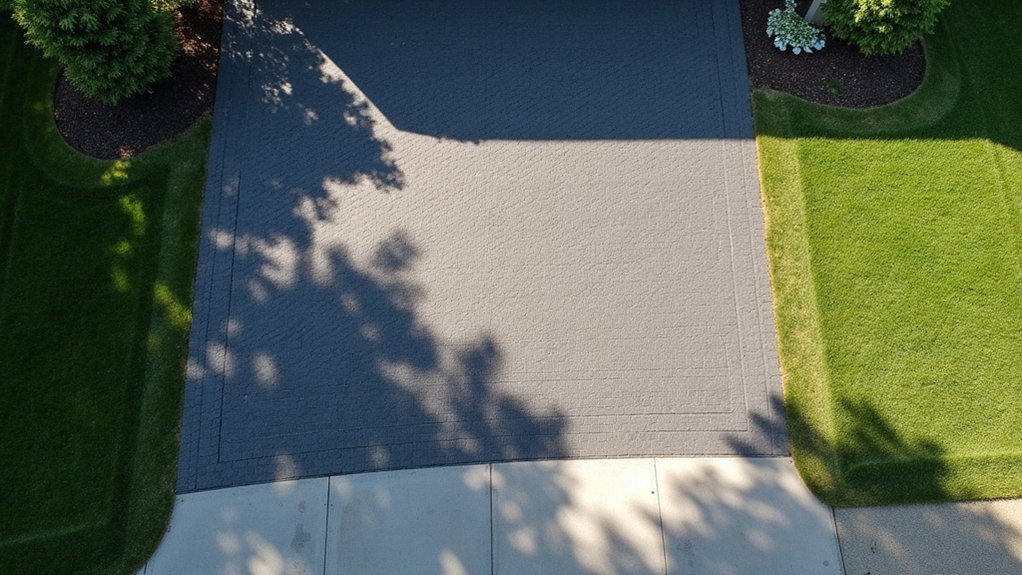
Contrasting aprons and parking pads transform monochromatic asphalt expanses into layered compositions that guide the eye while reinforcing structural performance at high-stress junctures. You’ll want an 8, 20 foot apron in pavers, cobblestone, brick, or stamped concrete at your driveway entrance, creating visual shift while distributing vehicular loads that minimize rutting. For parking zones, pair charcoal asphalt with light-colored permeable pavers to define distinct functional areas and address drainage codes simultaneously.
Install concrete aprons 4, 6 inches thick over crushed stone bases when heavy trucks frequent the property. This layered approach proves more economical than premium materials throughout, yet delivers sophisticated curb appeal through texture variation and defined borders. Consider adding decorative bands across the width of your asphalt driveway at even intervals to introduce rhythm and break up large expanses of surface area. Ensure your apron installation includes proper excavation and grading to establish effective drainage and prevent water accumulation at the street connection. Address long term maintenance requirements by sealing apron surfaces against UV and freeze-thaw damage, while seasonal durability concerns warrant periodic inspection of material changes where thermal expansion differs.
Upgrade to Stamped, Textured, or Colored Asphalt Finishes
Three surface-enhancement techniques, stamping, texturing, and color integration, elevate standard asphalt from utilitarian pavement to architectural hardscape while preserving the material’s inherent flexibility and cost advantages. You can personalize patterns and motifs ranging from geometric impressions to simulated cobblestone, all applied via thermal heating for deeper, longer-lasting embossing. Customize driveways with stained asphalt using UV-resistant pigments mixed during installation or applied post-pour for cost-effective updates. After stamping, a plate compactor ensures uniform surface smoothness before protective coatings are applied. The continuous surface design prevents weed growth and erosion between segments, common problems with traditional brick or stone installations. Stamped asphalt surfaces benefit from reduced maintenance requirements compared to segmented pavement options that demand regular joint cleaning and sand replacement.
| Finish Type | Primary Benefit |
|---|---|
| Stamped | Stone/brick aesthetics at 40, 60% lower cost |
| Textured | Enhanced traction; hides wear and staining |
| Colored | Vibrant hues coordinate with façades |
| Combined | Multi-dimensional designs maximize curb appeal |
These decorative surfaces deliver 15, 20 year lifespans while resisting cracking in freeze-thaw climates, outperforming segmented pavers and traditional concrete alternatives.
Enhance Your Driveway With Integrated Landscaping and Lighting
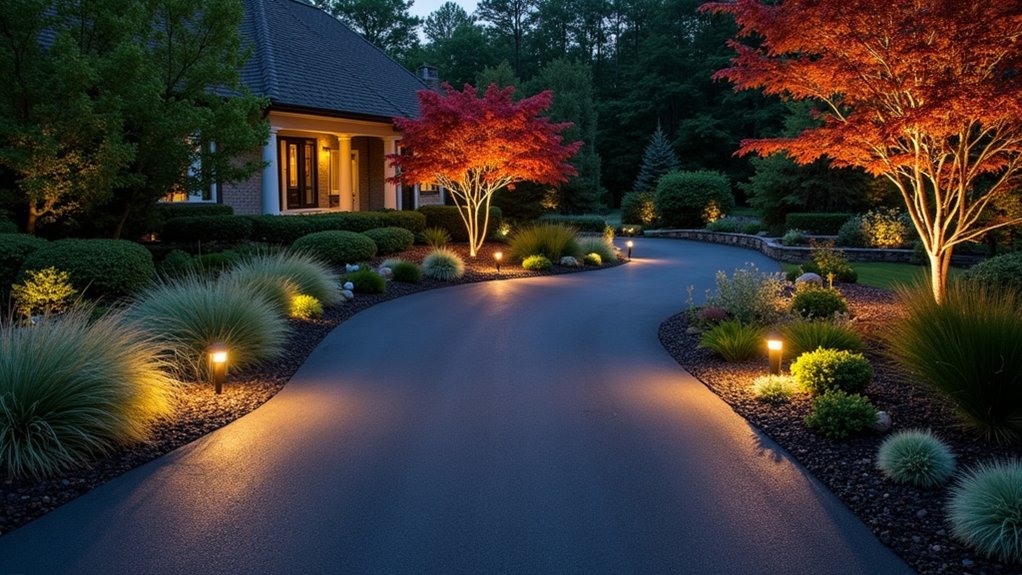
Pairing your asphalt driveway with strategic landscaping and lighting transforms a functional surface into a cohesive arrival experience that extends your home’s architectural language. Define edges with brick or stone borders that prevent asphalt deterioration while anchoring custom planting schemes of native shrubs and drought-resistant perennials. Mulch or stone ground cover suppresses weeds and reduces irrigation demands.
Install pathway lights or LED lane markers along borders to enhance navigation and safety after dark. Energy efficient lighting options like solar-powered bollards eliminate wiring complexity and ongoing costs. Highlight specimen trees or floral beds with uplighting to create dramatic nighttime focal points.
Consider masonry pillars at entry points, retaining walls with integrated plantings, or permeable paver strips that manage stormwater while supporting your landscape design. Belgian block edging provides an elegant border solution that protects surrounding landscaping while improving drainage around your driveway. Permeable pavers allow water to penetrate the ground while providing a sturdy base for vehicles. Natural stone pavers create an inviting walkway connection between your driveway and front entry. Select materials and fixtures that mirror your home’s style for unified curb appeal.
Frequently Asked Questions
How Often Should I Sealcoat My Asphalt Driveway to Maintain Its Appearance?
You should sealcoat your asphalt driveway every 2, 3 years to preserve its deep black finish and design integrity. This seal coat frequency balances protection without causing buildup. Your ideal driveway sealcoating schedule depends on site-specific factors: high-traffic areas and harsh climates warrant biennial applications, while low-traffic driveways in mild conditions can extend to three years. Wait 90 days to 12 months before sealing new asphalt, and always inspect twice yearly to assess surface condition before application.
What Is the Average Cost Difference Between Stamped Asphalt and Real Pavers?
Stamped asphalt typically costs $7-$15 per square foot, while real pavers range from $10-$30, making pavers 1.5 to 3 times more expensive upfront. These concrete cost differences reflect installation complexity and material quality. For your driveway, stamped asphalt offers budget-friendly aesthetics, whereas pavers deliver superior longevity (25-75 years vs. 10-20 years). When evaluating alternative paving options, you’ll find pavers require higher initial investment but often provide better long-term value through extended durability and lower maintenance costs.
Do Curved Driveways Require More Maintenance Than Straight Driveway Designs?
Yes, curved driveways typically require 10%, 20% more maintenance than straight designs. You’ll face increased drainage requirements due to water pooling at curves, plus more frequent edge repairs from vehicle turning stress. Snow removal challenges are significantly greater since plows can’t efficiently clear curved sections. You’ll also need additional drainage features like swales and more frequent inspections to prevent erosion. Straight driveways offer simpler maintenance with predictable wear patterns and easier seasonal upkeep.
Can I Add Decorative Edging to an Existing Asphalt Driveway?
Yes, you can retrofit decorative edging to your existing asphalt driveway. Start by excavating a shallow trench along the perimeter to accommodate decorative paver edging options like brick, stone, or Belgian block. Guarantee proper depth and width for stable placement, ideally set in concrete for durability. If you’re planning asphalt overlay applications, coordinate edging installation afterward to achieve a flush, professional finish that prevents edge erosion and enhances your property’s visual appeal.
What Permits Are Needed Before Installing Driveway Lighting or Making Layout Changes?
You’ll need a Driveway/Right-of-Way Permit for layout modifications and an Outdoor Lighting Permit for fixture installations per municipal regulations. Building permits become necessary when electrical work or substantial structural changes occur. If you’re in Dark Sky zones near Camp Bullis, additional permits apply. However, low-voltage systems under 25 volts typically don’t require electrical permits, and simple decorative cord-and-plug lighting may be exempt, though you should always verify your jurisdiction’s specific code requirements first.