


To properly clean your block paving driveway, start by evaluating surface condition and removing loose debris with a stiff broom. Extract weeds and moss from joints using physical tools or herbicides, then identify and pre-treat stubborn stains like oil or efflorescence. Apply a pH-neutral, stone-safe cleaning solution and scrub systematically with a non-metal brush. Rinse thoroughly from the highest point, inspect for missed areas, and allow complete drying before optionally sealing. This thorough approach guarantees lasting results and surface protection.
Assess the Condition of Your Block Paving Driveway
Before initiating any cleaning protocol, you must conduct a systematic visual inspection to establish baseline pavement condition. Document surface defects including cracks, rutting, and paver displacement through direct observation. You’ll need to evaluate crack width and location, as these signal underlying structural issues requiring remediation before cleaning proceeds. Perform subsurface stability assessment by tap-testing for hollow-sounding areas that indicate bedding loss or voids beneath pavers. Utilize a straight edge or spirit level for uneven settlement evaluation, measuring differential sinking across sections. Check for water pooling, blocked joints, and efflorescence indicating drainage failure. Record vehicle ruts, heaving, or frost damage patterns. Many disputes concerning block pavements relate to the visually noticeable appearance, making proper assessment critical before any cleaning intervention. This systematic assessment identifies problems early, preventing their escalation into costly repairs that could compromise the structural integrity of your driveway. Consider implementing monthly or quarterly assessments to protect your pavement investment through proactive maintenance. This exhaustive assessment determines whether cleaning is appropriate or if structural repairs must precede surface treatment to prevent exacerbating existing defects.
Clear the Area and Remove Loose Debris
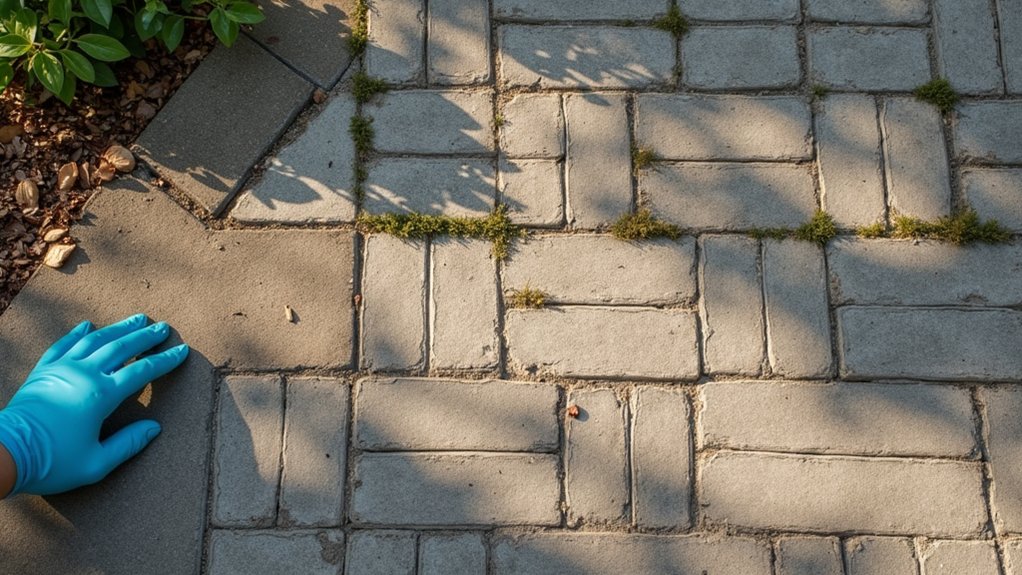
Once you’ve completed your structural evaluation and determined the driveway is suitable for cleaning, initiate the debris removal phase to establish a clean working surface. Gather large debris like branches by hand before sweeping to prevent obstruction. Use a stiff broom to optimize sweeping pattern by working from edges toward the center, collecting loose dirt, leaves, and litter systematically. Apply hard-bristled brushes to dislodge material trapped in joints, preventing brick shifting. Remove objects that could damage equipment or cause injury. Wear protective gloves and knee pads during manual collection. Collect debris into piles for bagging, avoiding drains to prevent clogs. Pull out any visible weeds by hand to ensure the surface is completely prepared for the cleaning process. Address any mold buildup between blocks during this inspection to prevent future shifting or cracking. Conduct a final inspection to confirm all loose particles are cleared and joints are free from buildup before proceeding to wet cleaning phases.
Extract Weeds and Moss From Paving Joints
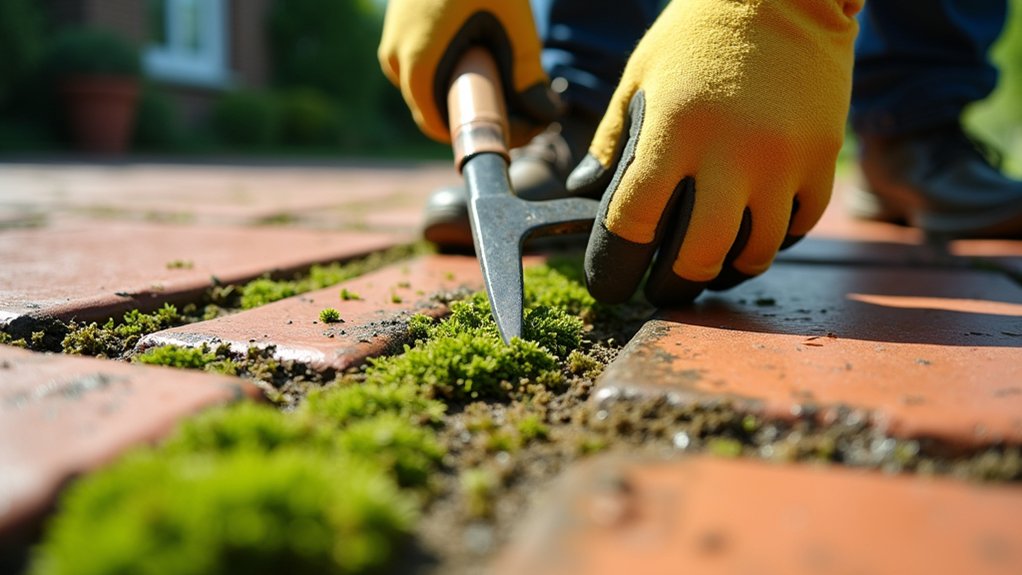
Why do weeds and moss proliferate in block paving joints? They establish themselves when joints deteriorate, retaining moisture and organic debris. To extract them, first employ physical tools, putty knives, screwdrivers, or stiff brushes, to dislodge roots from joints. For resistant growth, pour boiling water directly into cleared joints, denaturing plant proteins on contact. Alternatively, apply systemic herbicides following manufacturer instructions, testing compatibility on inconspicuous areas first. Pressure washing provides mechanical removal but requires caution: maintain 18 inches distance initially and wear eye protection to prevent debris injury. Avoid excessive pressure that displaces jointing sand. After extraction, refill joints immediately with polymeric or kiln-dried sand, watering it in for firm settlement. Following weed removal, spray herbicide into paving joints to provide approximately 6 months protection against regrowth. Periodic joint refilling prevents regrowth, while encouraging paver surface drainage reduces moss-favorable conditions, maintaining long-term joint integrity.
Pre-Treat Oil, Grease, and Other Stubborn Stains
Before deep-cleaning your block paving driveway, you’ll need to pre-treat oil, grease, and stubborn stains to prevent them from spreading or setting deeper into the paver pores. Start by identifying the stain type, fresh oil requires immediate absorption with kitty litter or sawdust, while older petroleum-based stains need chemical degreasers or enzymatic cleaners. Apply the appropriate treatment product according to manufacturer instructions, allow sufficient dwell time, then scrub with a stiff-bristled brush and repeat the process until the stain lifts. For particularly stubborn or old stains, consider using the poultice method with baking soda or diatomaceous earth to draw out deeply embedded oil. If commercial degreasers prove ineffective, try applying full-fat Coca-Cola to the stain and let it fizz for a couple of minutes before washing off with water.
Identify Different Stain Types
Stain identification directly impacts your treatment strategy and cleaning success rate. You’ll need to analyze appearance, texture, and location to determine proper removal methods. Fresh oil stains appear dark and sticky, while grease creates shiny, slick patches that penetrate deeper. Biological growth shows as green, black, or white spots in shaded areas. Recognizing stain sources helps you select appropriate cleaning agents and techniques.
| Stain Type | Key Identification Features |
|---|---|
| Oil/Grease | Dark, wet appearance; sticky or slick texture |
| Biological (Mold/Algae) | Green, black, or white spots in damp zones |
| Rust | Orange-brown discoloration near metal objects |
| Efflorescence | White, powdery crystals on surface |
| Organic Matter | Brown tannin marks from leaves/plant debris |
Apply stain identification techniques before selecting treatment products to avoid surface damage. Mould and algae stains typically develop in areas where water can pool and paving receives minimal sunlight, such as under pot plants or near downpipes. Before treating any stains, ensure you check for previous sealant on the pavers, as this can affect how cleaning products penetrate and interact with the surface. After treating stubborn stains, neutralizing the surface is essential to remove any chemical residue that could prevent proper penetration of protective sealers.
Apply Appropriate Treatment Products
After identifying the stain type, you’ll need to break down stubborn contaminants with targeted pre-treatment products before general cleaning begins. Apply specialized oil stain removers directly to affected areas using a brush or low-pressure sprayer. These formulations combine surfactants and solvents to dissolve hydrocarbon-based residues without compromising the paving surface. Allow 15, 30 minutes dwell-time for aged or heavy stains to guarantee proper penetration.
Evaluate suitability of cleaning products by reviewing manufacturer specifications and safety data sheets, particularly for solvent-based options requiring PPE. Consider products specifically designed to work with polyurethane sealers if your driveway has been previously sealed, as compatibility ensures effective cleaning without degrading the protective coating. For heavily contaminated surfaces, products like intensive block paving cleaner provide deep-cleaning action before pressure washing. Rinse treated zones thoroughly with clean water to eliminate all chemical residues before proceeding. This step prevents runoff contamination and prepares the surface for subsequent sealing. Proper pre-treatment increases removal efficacy while helping you maintain ideal surface texture throughout the restoration process. Once cleaning is complete, wait 24 hours after paver installation or cleaning before applying a protective sealer to enhance durability and appearance.
Scrub and Repeat Process
Once pre-treatment products have achieved initial breakdown, you’ll commence mechanical agitation using a hard-bristled brush to physically dislodge embedded contaminants from the paving texture. Scrub in diagonal or circular motions, applying gentle, steady pressure to protect jointing sand and compound integrity. Work section-by-section, frequently inspecting progress to identify areas requiring additional attention.
Stain persistence often demands multiple treatment cycles. After initial scrubbing, rinse thoroughly with hot water, then reassess the affected area. Reapply cleaning solution or degreaser to remaining spots, allowing 15, 30 minutes dwell time before repeating the scrubbing process. Exercise patience throughout this iterative approach; oil and grease stains may require three or more applications for complete removal. Avoid harsh chemicals during repeated treatments, as excessive exposure can erode or discolor paving surfaces. For particularly stubborn organic stains and black spots, consider applying a hard surface cleaning solution containing sodium hypochlorite between scrubbing cycles.
Apply a Stone-Safe Cleaning Solution
When selecting a cleaning solution for your block paving driveway, prioritize pH-neutral or stone-specific formulations that won’t compromise the integrity of natural stone surfaces. Avoid acid-based cleaners, ammonia, and bleach, as these degrade stone and address environmental impact by harming surrounding vegetation. Opt for biodegradable products labeled eco-friendly to guarantee long term effectiveness while protecting local ecosystems.
Always pre-test solutions on a discreet area to confirm compatibility. Follow manufacturer instructions precisely regarding dilution ratios and dwell time. Wear protective gloves during application. Use a bucket and non-metallic brush to distribute the cleaner evenly across the surface. For specific stains, employ targeted treatments: stone-safe fungicides for algae, paving degreasers for oil, and baking soda paste for moss. Thoroughly rinse with clean water after treatment to remove residual agents and restore the paving’s appearance.
Scrub the Surface Thoroughly
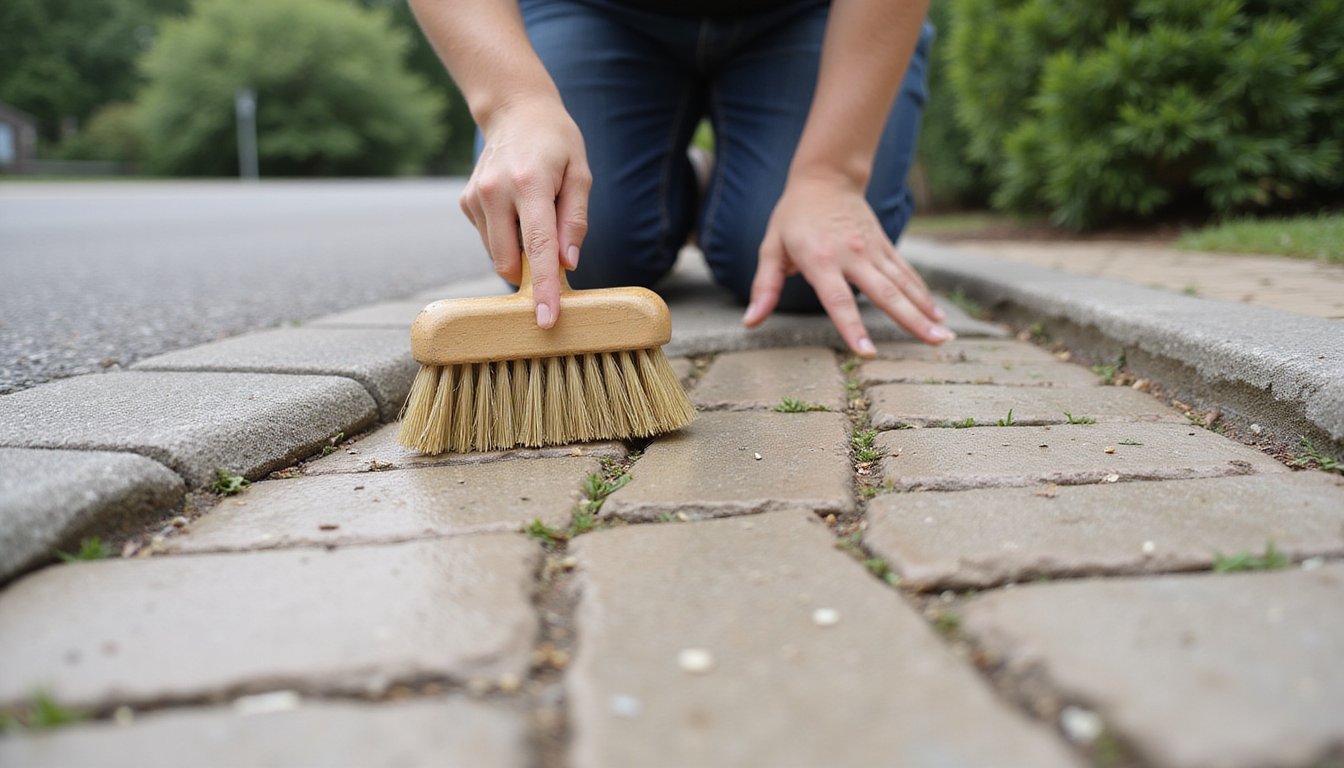
Once you’ve applied the cleaning solution, select a stiff-bristled, non-metal brush designed for masonry surfaces to avoid scratching or damaging the pavers. Work systematically across the driveway in manageable sections, applying moderate, consistent pressure while using circular or back-and-forth motions to lift embedded dirt and grime. Concentrate additional scrubbing effort on heavily stained areas, such as oil spots, algae patches, or lichen growth, which may require multiple passes and pre-treatment with specialized stain removers.
Focus on Problem Areas
After applying your cleaning solution and allowing adequate dwell time, begin systematic scrubbing with a stiff-bristled brush or driveway broom to mechanically agitate embedded contaminants. Direct your concentrated cleaning efforts toward visibly stained or heavily soiled sections that require enhanced spot removal techniques.
Target these problem areas with intensified mechanical action:
- Oil and grease stains, Apply additional degreaser and scrub vigorously in circular motions to break down petroleum-based residues before they penetrate deeper.
- Paving joints, Work bristles deep into gaps to dislodge accumulated biofilm, organic matter, and compacted dirt that harbor future weed growth.
- Persistent discoloration, Repeat chemical application and scrubbing cycles on stubborn patches, monitoring for surface improvement between treatments.
Exercise caution with aggressive chemical concentrations to prevent paving discoloration during repeated applications.
Use Proper Scrubbing Tools
Selecting appropriate scrubbing equipment determines cleaning effectiveness while minimizing damage to your block paving surface. For efficient scrub brush selection, choose coarse brushes with long handles that provide controlled surface agitation. Use scraping tools with hooked edges to clear debris and compacted material from joints before applying brushes. Stiff brooms work best for distributing kiln-dried sand and scrubbing wide joints thoroughly.
Consider block paving cleaning machines with adjustable bristle heights, allowing tailored intensity from deep to soft cleaning. Wire brush attachments effectively remove moss without chemicals. Work your brush in multiple directions to cover all joints completely.
For maintaining brushes and attachments, conduct inconspicuous patch testing before full operation. Replace mechanical cleaner brushes after approximately 700 m² of coverage. Guarantee 360° guards remain intact to prevent flying debris hazards during operation.
Rinse Away All Cleaning Residues
Thorough rinsing removes all cleaning residues from your block paving driveway and guarantees long-term surface damage. You’ll need adequate water pressure to completely eliminate sodium hypochlorite and other chemical agents that cause discoloration if left on surfaces. Implement a proper rinsing sequence by starting at the highest point and directing runoff toward drainage points.
Proper rinsing with adequate water pressure prevents chemical residue buildup and surface discoloration on block paving driveways.
Essential rinsing steps:
- Apply multiple rinse passes after chemical dwell time, using high-pressure settings to extract residues from joints and textured areas
- Inspect for visible soap traces or slickness indicating incomplete removal requiring additional attention
- Direct contaminated runoff toward appropriate drainage, avoiding garden beds and preventing undermining of paver stability
Consider drying considerations, wet surfaces mask streaking until completely dry, so ensure thorough residue elimination during the rinsing phase.
Inspect for Missed Areas and Repeat if Necessary
After thoroughly rinsing the surface, conduct a systematic visual inspection to identify any remaining stains, discoloration, or residue that requires additional treatment. You’ll need to assess each problem spot individually and apply targeted re-cleaning methods based on the specific type of soiling present. Complete your work with a final surface quality check to verify the entire driveway meets acceptable cleanliness standards before proceeding to joint sand replacement.
Identifying Remaining Problem Spots
Once your block paving driveway has dried completely, conduct a methodical visual inspection to identify areas that require additional attention. Use side lighting during early morning or late afternoon to highlight surface irregularities, focusing on identifying uneven surface conditions and evaluating joint condition throughout the paved area.
Target these common problem zones:
- Borders and corners where cleaning tools may have missed trapped debris and persistent weed growth between blocks
- Drainage channels and high-traffic zones that frequently harbor stubborn stains, algae buildup, or sediment accumulation
- Previously shadowed areas obscured by vehicles or objects during initial cleaning passes
Employ a damp cloth wipe test to detect lingering grime, and mark problem spots with temporary chalk for systematic follow-up treatment. Standing water or loose blocks indicate immediate re-work requirements.
Targeted Re-Treatment Methods
Despite completing the initial cleaning process, your block paving driveway will likely contain areas that require focused intervention. You’ll need to perform repeat application of jointing sand where compaction has caused subsidence, ensuring the surface remains dry to prevent clumping. Stubborn stains demand specialized cleaners, citrus-based solutions effectively remove efflorescence, while hot soapy water addresses localized grime. Allow dwell time before rinsing to maximize removal efficiency.
Monitor progress of weed and moss treatments, reapplying herbicides to persistent growth spots using targeted sprayers. Lift and re-level sunken blocks by adjusting base material, then re-compact firmly. Apply protective sealant to previously missed sections once the surface is completely dry. Inspect treated zones after one week, repeating interventions until all problem areas achieve uniform cleanliness and stability.
Final Surface Quality Check
The final inspection requires systematic examination of the entire driveway surface using a structured grid pattern to ascertain no areas are overlooked. You’ll need to verify consistent visual uniformity across all sections, checking for residual cleaning solution, remaining stains, or debris accumulation in joints.
Critical quality control sign off parameters:
- Surface cleanliness verification, Guarantee complete removal of excess joint sand, leaves, mud, and oil stains that compromise appearance or create slip hazards
- Joint integrity assessment, Confirm sand filling remains 1/4 in. below chamfer edges with no surface contamination obscuring paver texture
- Deficiency documentation, Record any missed areas, persistent staining, or cleaning inconsistencies requiring targeted re-treatment before final acceptance
Document all findings on your inspection checklist and address deficiencies immediately to meet handover standards.
Allow the Driveway to Dry Completely
| Condition | Impact on Drying |
|---|---|
| Warm, sunny, low humidity | Accelerates evaporation |
| Cold, humid, overcast | Extends drying 2, 3× |
| Shaded areas, poor drainage | Slows moisture release |
| Nighttime dew exposure | Reintroduces surface moisture |
Verify complete dryness through visual and tactile inspection, surfaces must feel completely dry, including joints. Insufficient drying causes sealant cloudiness, adhesion failure, and trapped moisture leading to efflorescence or biological regrowth.
Consider Sealing to Protect Your Clean Block Paving
After thoroughly cleaning and drying your block paving, applying a quality sealant provides critical protection that extends surface lifespan and simplifies ongoing maintenance. You’ll create a barrier against UV degradation, moisture intrusion, and stain penetration while reducing weed growth and contaminant accumulation.
Quality sealant application creates a protective barrier that extends block paving lifespan while preventing UV damage, moisture penetration, and weed growth.
Key sealing considerations:
- Material selection, Choose polyurethane or acrylic-based sealers for ideal durability and coverage, minimizing reapplication frequency while delivering long-term cost savings through extended surface protection.
- Application safety, Prevent overspray and runoff that could damage surrounding vegetation; select low-VOC or water-based formulations to reduce environmental impact during application.
- Maintenance intervals, Plan for resealing every 2, 5 years depending on traffic loads and exposure conditions, ensuring continuous protection against freeze-thaw cycles and structural deterioration.
This protective measure effectively doubles your driveway’s functional lifetime.
Frequently Asked Questions
How Often Should I Clean My Block Paving Driveway?
You should clean your block paving driveway annually as a baseline, with seasonal maintenance in spring to remove winter debris and salt deposits. If you’re experiencing heavy traffic, tree cover, or significant moss growth, you’ll need occasional deep cleaning every six months. Perform weekly sweeping and monthly spot-cleaning to prevent organic buildup and slip hazards. For high-traffic areas, schedule pressure washing and re-sanding every 2-3 years to maintain structural integrity and proper drainage.
Can I Use a Pressure Washer on Block Paving?
Yes, you can use a pressure washer on block paving when using correct pressure settings and proper technique. Start with lower settings to prevent damage, holding the lance at 45° approximately 200mm from the surface. You must avoid aiming directly into joints, as avoiding excessive water pressure protects jointing sand from washing away. Always sweep debris first, maintain safe distances from the surface, and re-sand joints afterward to restore structural integrity and prevent paver movement.
What Causes White Patches on Block Paving After Cleaning?
White patches on your block paving after cleaning primarily result from efflorescence formation, where moisture draws salts to the surface, reacting with atmospheric CO₂ to create calcium carbonate deposits. Improper rinsing techniques can also leave polymeric sand haze or sealer residue that appears white. You’ll notice these patches when water movement increases salt migration or when you haven’t thoroughly removed surface dust before activation. Guarantee proper drainage and complete drying to minimize recurrence.
How Long Does It Take for Block Paving to Dry?
Block paving typically dries in 1, 2 hours under ideal conditions, but you’ll need to wait 4 hours for light foot traffic and 24, 36 hours before vehicle use. Drying time factors include temperature, humidity, and sealer type; cool or damp weather drastically extends these intervals. You’re preventing premature drying issues by avoiding traffic until fully cured, which takes several days. Always follow manufacturer guidelines, as rushing access can cause surface damage, scuffing, or sealer failure that compromises your paving’s longevity.
Do I Need to Re-Sand Joints After Cleaning?
Yes, you’ll need to re-sand joints after cleaning, as pressure washing typically removes existing joint sand. Replenishing joint sand is crucial for maintaining paver interlock and preventing movement. Once your driveway’s completely dry, apply kiln dried sand and sweep it diagonally into joints using a soft broom. This process stabilizes the blocks and prevents weed growth and water ingress. If you notice uneven surfaces, consider re-leveling joints before sand application to guarantee proper structural integrity.