


Start by gathering a 25-ft tape measure, laser distance measurer, stakes, and string line. Mark your boundaries by driving stakes at corners and verifying perpendicularity with the 3-4-5 triangle method. Measure length and width twice for ±2-inch accuracy, then use a spirit level or laser level to evaluate slope, maintaining a 2% minimum grade (1/4″ per foot) for code-compliant drainage. Calculate total square footage, determine material quantities, and document all measurements. The sections below break down each measurement technique with precise formulas and professional-grade methods.
Gather the Right Measuring Tools and Equipment
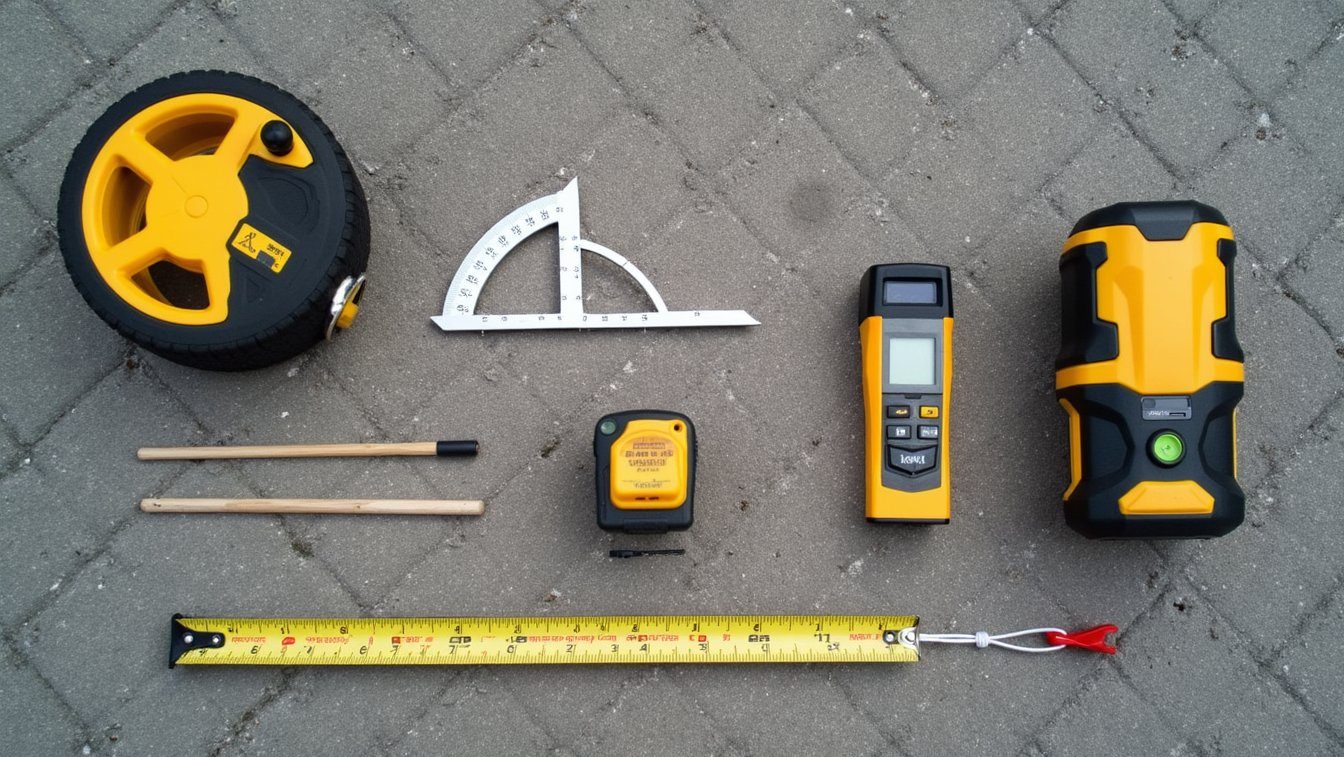
Accurate driveway measurement requires five categories of specialized tools: linear measuring devices, angle and elevation instruments, layout marking equipment, advanced digital measurers, and supporting accessories. You’ll need a standard 25-ft tape measure (1-inch wide) for basic dimensions, plus 100-ft to 300-ft reels for property boundaries. Measuring wheels with 12-inch+ diameters and odometer counters guarantee measure consistency across long distances. Electronic protractors deliver 0.1-degree accuracy for slope calculations, while inclinometers determine grade percentages. Laser distance measurers provide fast, precise readings and calculate areas automatically. Electronic distance measuring instruments count both up and down while holding 4 separate calibrations for different measurement scenarios. Grade stakes, masonry string, and chalk reels establish reference points and alignment guides. Weather-resistant construction is essential for outdoor durability. Mechanical measuring wheels use a tally-like device to track measurements and eliminate the need for batteries during extended outdoor work. Always record measurement details using marking pens and measuring rods with dual imperial/metric scales for documentation and verification purposes. A rigid metal rule serves as an excellent straightedge when marking cutting lines on sheet materials or creating layout references.
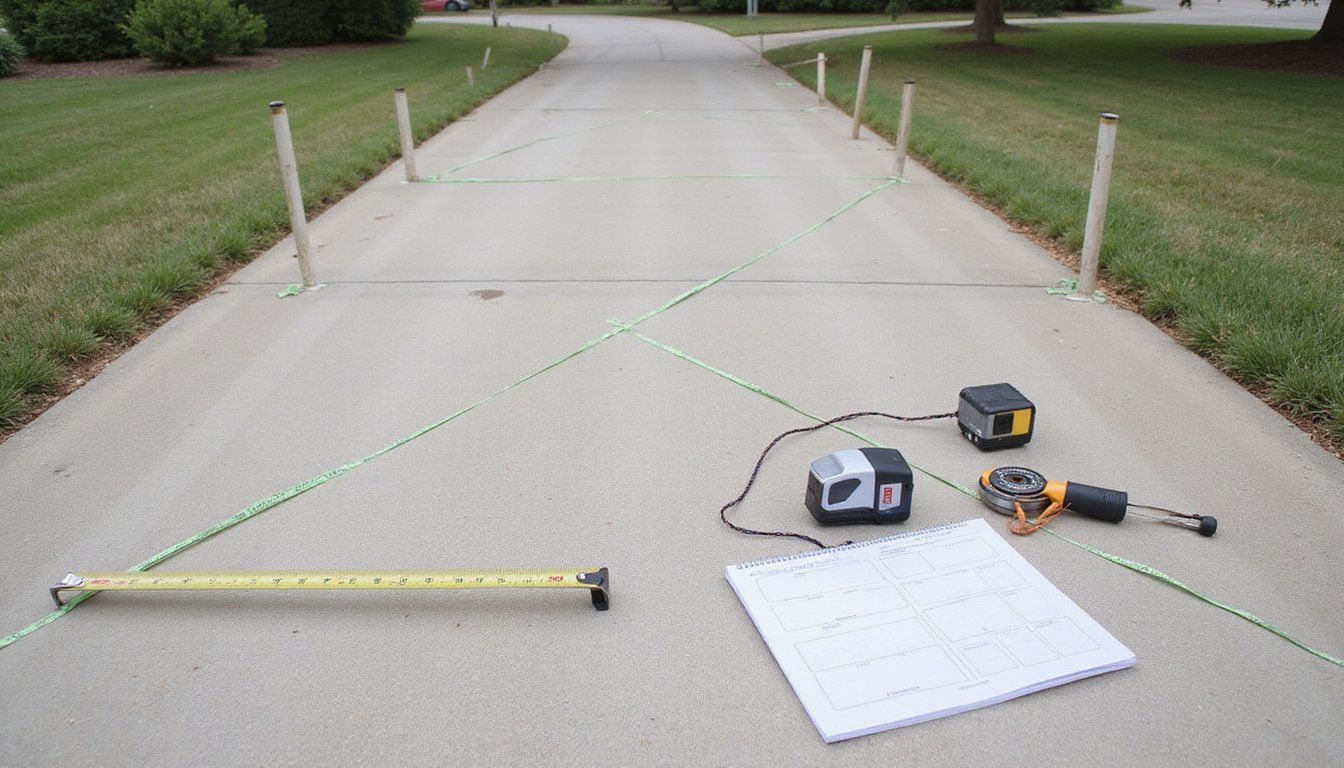
Mark Your Driveway Boundaries and Shape
Laying out precise boundaries transforms rough measurements into actionable construction guides that contractors can follow without ambiguity. Drive stakes at corner points and stretch string between them to establish straight lines, ensuring correct boundary alignment with your site plans and property lines. Verify perpendicularity using the 3-4-5 triangle method at all right angles.
For curved sections, you’ll need flexible curve marking techniques: anchor a tape measure at the arc’s origin and scribe the radius, or use garden hoses and marking paint to trace irregular shapes. Mark arc points every 600, 900 mm with stakes for radii under 5 meters. Position intermediate pins by halving the distance between existing pins to maintain accurate curve definition.
Incorporate your drainage slope into the layout by setting stakes at varying heights, maintaining a minimum 2% gradient away from structures. Address drainage needs during the marking phase to prevent water pooling and ensure proper runoff patterns. Install edge restraints along marked boundaries before excavation begins. Define the boundary markings with stakes and string to create a clear separation between the future driveway surface and surrounding yard areas.
Take Precise Length and Width Measurements
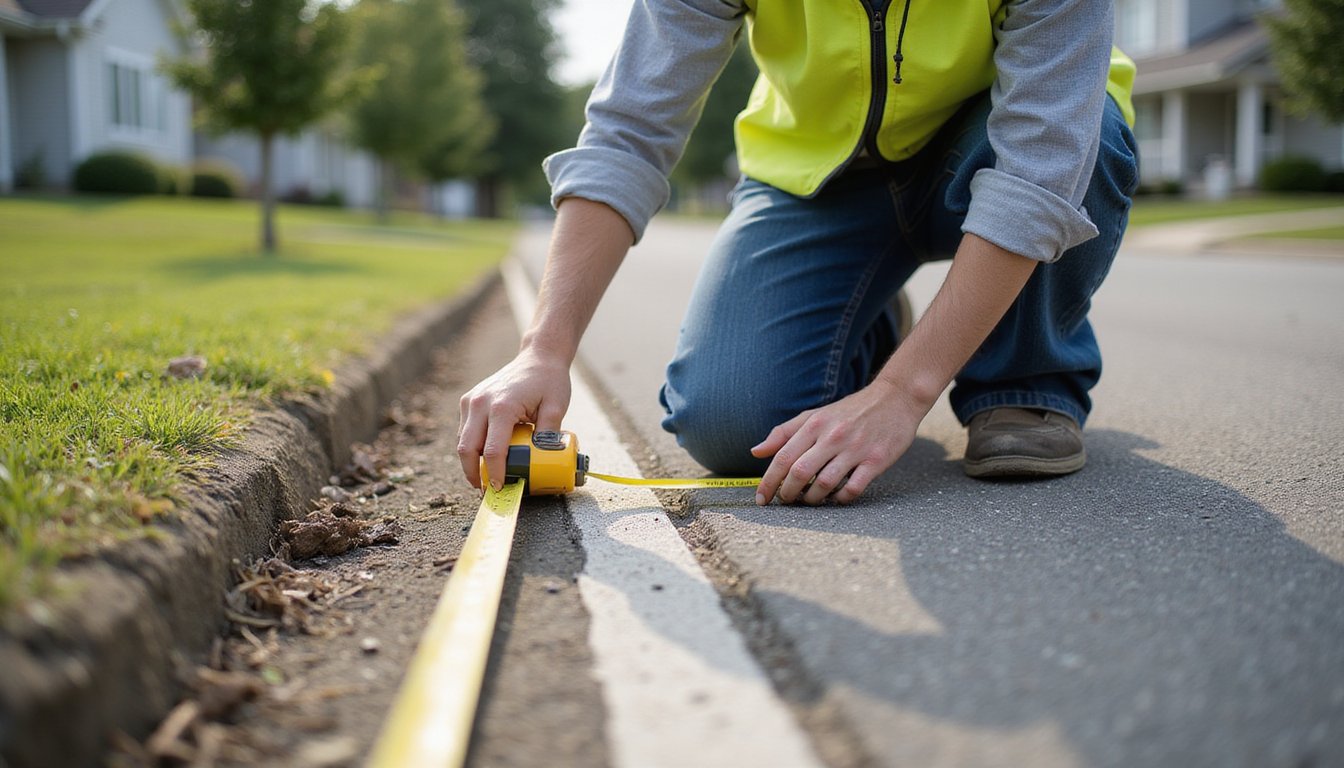
With your boundary stakes and string lines established, you’re ready to capture the numerical dimensions that will form the basis of your material calculations and cost estimates. Deploy a measuring tape or laser distance measurer along each marked boundary, recording length and width for every driveway segment. For straight sections, measure twice to verify accuracy within ±2 inches. Complex geometries require perimeter tracing techniques using measuring wheels or digital mapping applications to capture curved edges precisely. Document each measurement immediately, noting segment type (rectangle, trapezoid, arc) and corresponding dimensions. Conduct a segment measurements review by remeasuring critical spans and verifying that recorded values align with physical markers. Break down the space into simple geometric shapes, calculate the area of each shape individually, and add them together for a comprehensive total. Remote measuring tools can save significant time by allowing you to obtain preliminary dimensions before conducting on-site verification. Keep in mind that standard residential driveways typically measure 12-20 feet wide and 20-30 feet long, which can serve as a reference point for validating your measurements. This methodical approach guarantees your area calculations reflect actual site conditions, providing contractors with dependable square footage data for accurate material ordering and bid preparation.
Evaluate Slope and Drainage Requirements
You’ll need to determine your driveway’s elevation change and grade to meet the minimum 2% slope (1/4 inch per foot) required for proper water runoff. Use a string line with stakes and a spirit level for short distances, or deploy a laser level for longer driveways to measure the rise over run accurately. Document where water currently flows or pools, as this data identifies whether you’ll need crown grading, perimeter channels, or subsurface drainage solutions before paving begins. Calculate the slope as a percentage by dividing the change in height by the length and multiplying by 100% to determine if your gradient requires special surfacing materials. For precise angle measurement, you can utilize a theodolite to measure from the observer’s position to the same height at the top of the driveway. Consider both endfall and crossfall slopes to ensure water flows away in the intended direction and drains efficiently across the entire driveway surface.
Measure Elevation and Grade
Before you can guarantee proper water runoff and vehicle safety, you must measure your driveway’s elevation and grade with precision. Establish benchmark reference points using optical or laser levels, then identify critical elevation points at the start, end, and junctions. Run a leveled string between stakes and measure vertical distances from ground to reference line at each station.
Calculate grade using the formula: (vertical rise ÷ horizontal run) × 100. A 2-foot rise over 20 feet equals 10% grade. For accurate measurements, use a measuring tape along with string and a calculator to determine precise distances and perform grade calculations. Code-compliant driveways require minimum 2% slope (approximately 1/4″ per foot) for drainage, with 15% maximum to prevent vehicle scraping. Monitor connection areas for level changes that could create ponding. Express your grade measurements as a percentage to maintain consistency with standard construction practices and drainage specifications. Position your stakes according to the layout plan and attach line collars on the stakes to secure string lines approximately 6 inches above the finished grade. Document all readings, stake locations, elevation differences, and grade percentages to guide subbase preparation and paving execution.
Identify Drainage Solutions Needed
| Slope Condition | Primary Solution | Secondary Augmentation |
|---|---|---|
| <1% (minimal fall) | Channel drain at both ends | Strip drain at grade shifts |
| 1, 2% standard | Single trench drain at low point | Permeable paving with biannual maintenance |
| 2, 3% moderate | French drain along structure | Swale for landscape runoff |
| 3%+ steep | Retaining wall with drainage gaps | Solid PVC conveyance to storm system |
| Variable/complex grade | Multiple integrated drains | Professional hydrology assessment |
The terms “slope” and “pitch” are used interchangeably when evaluating your driveway’s drainage characteristics, both referring to the intentional incline that manages water flow away from structures.
Calculate Total Square Footage and Area
Accurate square footage calculation forms the foundation of any driveway paving project, directly impacting material estimates, cost projections, and installation timelines. For rectangular driveways, you’ll multiply length by width in feet. When dealing with irregular layouts, divide the area into manageable geometric shapes, rectangles, triangles, or circles, calculate each section separately, then sum the totals. Thorough measurement steps require converting all dimensions to feet before calculating (divide inches by 12).
Divide irregular driveways into basic shapes, rectangles, triangles, circles, then calculate and add each section for accurate total square footage.
Precise area calculations demand attention to:
- Surface measurement over sloped terrain to capture actual coverage, not just horizontal distance
- Deduction of landscape islands or obstacles by measuring and subtracting their square footage
- Application of curve correction factors (typically 0.95) for S-shaped or sharply curved sections
Document all calculations for verification and future reference.
Determine Material Quantities Based on Measurements
Once you’ve calculated the total square footage of your driveway, multiply this area by your material’s required depth (converted to feet) to determine cubic feet, then divide by 27 to obtain cubic yards. You must account for 10-15% compaction loss, as gravel and aggregate materials will compress during installation and reduce in volume. This additional material guarantees you’ll have sufficient quantity after compaction to achieve the specified finished depth and prevent material shortfalls mid-project.
Calculate Total Square Footage
After gathering your driveway’s basic dimensions, you’ll convert these measurements into total square footage, the foundation for all material quantity calculations.
For rectangular sections, multiply length by width to obtain area. Circular or curved portions require π × radius² for complete circles, or proportional calculations for partial arcs. When working with irregular driveways, sum the square footage from each independently measured section.
Critical calculation steps:
- Accurately verify measurements by re-measuring complex shapes; errors here cascade through every subsequent estimate
- Apply curve correction factors when driveways follow significant arcs to maintain specification compliance
- Double check area calculations before material ordering to prevent costly shortages or avert wasteful excess
Document each section’s calculated area systematically. This data-driven approach guarantees code-compliant installations and eliminates guesswork from material procurement.
Account for Compaction Loss
Every paving material undergoes volumetric reduction during compaction, a phenomenon that’ll derail your project if you order based solely on finished dimensions. Hot Mix Asphalt typically loses 20-25% volume, requiring you to calculate loose thickness accordingly. For a 2.4-inch finished surface, you’ll need 3 inches of loose material (2.4 ÷ 0.8). Apply the formula: loose thickness = compacted thickness ÷ (1 – compaction loss %). Material compaction allowances vary by mix type. Cold Mix demands 25-30%, while Stone Mastic Asphalt requires 15-20%. Industry standards mandate compaction density testing at ≥95% of lab Rice numbers, with field verification documenting compliance. Each 1% increase in air voids reduces pavement life by approximately 10%, making accurate material compaction allowances critical for longevity and warranty validation.
Document Everything and Secure Required Permits
Accurate documentation forms the foundation of any compliant driveway paving project and protects your investment throughout construction and beyond. Document thoroughly by capturing site sketches with boundaries, dimensions, and property line distances. Retain all correspondence with contractors and municipal officials, plus receipts and material proofs for warranty claims.
Thorough documentation, site sketches, correspondence records, and receipts, safeguards your paving project investment and ensures regulatory compliance from start to finish.
Before breaking ground, identify your local permit requirements through city or county building departments. Urban properties near public infrastructure face stricter regulations than rural zones.
Critical compliance actions:
- Submit complete permit applications including project plans, parcel numbers, and cross-street identification, processing takes days to weeks
- Pay upfront fees ranging from $50, $200, plus potential bonds calculated as project-value percentages
- Schedule mandatory inspections before, during, and after construction to avoid fines, stop-work orders, and costly retroactive permits
Frequently Asked Questions
How Much Does Professional Driveway Measuring Cost Versus Doing It Yourself?
Professional driveway measuring typically costs $100, $250 bundled with site assessment, or $75, $150 standalone, though many contractors include it free with estimates. DIY measuring costs $10, $30 for tool rental or purchase, with free online calculators available. For a cost comparison, you’ll save upfront with DIY on simple rectangular driveways, but professional consultation reduces accuracy risks that could cost hundreds in material errors. Complex layouts justify professional measurement’s precision and code-compliant grading assessment.
What Are Common Measurement Mistakes Homeowners Make When Measuring Driveways?
You’ll often make inaccurate measurements by relying on rough estimates instead of calibrated tools, resulting in 15-30% material overages or shortfalls. Improper documentation occurs when you skip recording width and length for each section, neglecting irregular shapes and slope variations. You’ll also underestimate dimensions by ignoring vehicle turning radius requirements (minimum 20-foot radius for standard cars) and forgetting to verify local code minimums. Always double-check measurements and mark layouts physically before contractor handoff.
How Do Weather Conditions Affect the Accuracy of Driveway Measurements?
Temperature fluctuations directly impact your measurement accuracy by causing material expansion or contraction, with tools performing at their best within ±0.1 degrees of their recommended range. Precipitation levels compromise precision through ground softening, marker displacement, and equipment malfunction, particularly affecting electronic sensors that require site-specific calibration. You’ll experience reduced accuracy during freeze-thaw cycles and heavy rainfall, as surface conditions shift and moisture disrupts both manual and digital measurement devices, necessitating recalibration and repeated measurements for code-compliant results.
Should You Remeasure Your Driveway if the Original One Is Damaged?
Yes, you must remeasure your damaged driveway before paving. Structural deterioration alters original dimensions through settling, cracking, and edge distortion, rendering previous measurements obsolete. Accurate re-measurement guarantees precise material calculations, prevents cost overruns, and identifies subsurface voids requiring remediation. Periodic inspection reveals dimensional changes from foundational failure, while onsite assessment with laser tools captures current conditions that satellite imagery can’t detect. This data-driven approach certifies code-compliant specifications for base depth, drainage slope, and proper material volume ordering.
Can Smartphone Apps Accurately Measure Driveway Dimensions for Paving Projects?
Smartphone apps aren’t sufficiently accurate for paving projects due to measuring app accuracy limitations of ±4.9 meters under ideal conditions. You’ll encounter smartphone measurement limitations, including GPS signal obstruction, calibration requirements, and environmental factors that can cause errors exceeding acceptable tolerances. Professional paving requires precision within 3 inches per 100 feet, achievable only with measurement wheels or laser distance meters. While apps work for rough estimates, you shouldn’t rely on them for contractor bids or material calculations requiring code-compliant specifications.