


Your driveway paving process begins with site assessment and planning, where you’ll map utilities and evaluate soil stability. Next, you’ll excavate unstable material and compact the subgrade to 95% maximum density. Then you’ll install a 4, 6 inch base layer of angular gravel with proper compaction. You’ll apply the asphalt surface at 2, 3 inches thick using temperature-controlled compaction between 275, 185°F. Finally, you’ll complete finishing work and allow 24, 48 hours for initial curing. The following sections detail each technical specification.
Site Assessment & Planning
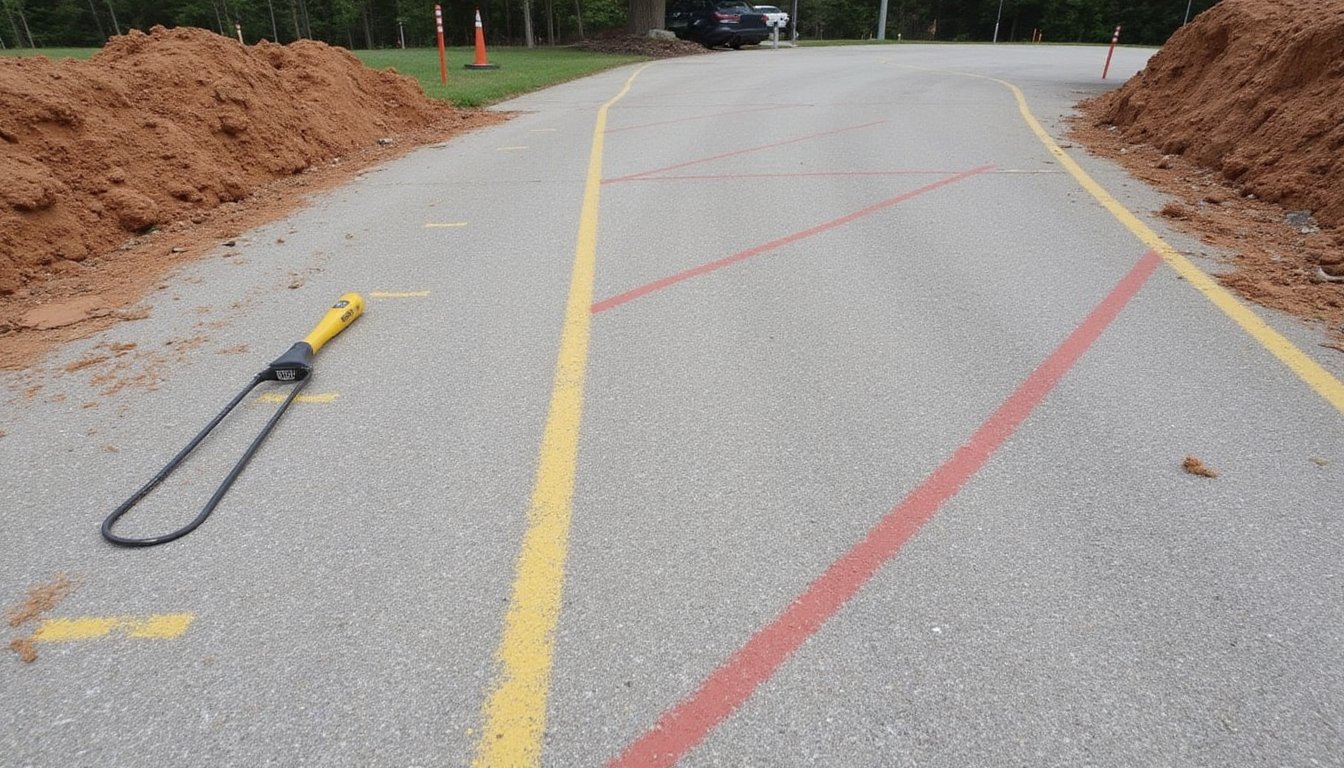
Before any equipment arrives on site, a thorough assessment establishes the foundation for successful driveway installation. You’ll need underground infrastructure mapping to locate utilities, tree roots, and obstructions that could compromise the paving structure. Your contractor evaluates soil stability, surface geometry, and existing damage like alligator cracking or potholes that signal structural deficiencies.
Drainage calculation analysis determines the minimum 1, 2% slope required for water runoff. The grading plan identifies pooling areas and establishes where French drains or erosion controls are necessary. You’ll also verify local permit requirements, setback regulations, and storm drainage compliance.
Material specifications are determined based on soil conditions, typically 8, 12″ total depth for asphalt installations. Proper planning ensures durability and longevity of the asphalt surface throughout its expected lifespan. Standard residential driveways measure 12-20 feet wide and 20-30 feet long, providing adequate space for vehicle access. Detailed documentation includes site measurements, photographs, and marked boundaries that guide the entire construction process. The assessment phase includes marking and excavating the designated area to establish precise boundaries for the installation.
Excavation & Subgrade Preparation
Once excavation begins, your contractor removes all organic material, topsoil, debris, and unstable soil to expose the load-bearing subgrade that’ll support the pavement structure. Excavators and loaders dig several inches below final grade to achieve design depth, while fine grading guarantees correct cross-section using survey stakes.
Compaction follows immediately to eliminate air voids and reach 95% maximum dry density through multiple passes at ideal moisture content. If unsuitable soils appear, your contractor implements soil stabilization with lime or cement additives, or replaces material with crushed stone. Areas with soft spot conditions require replacement with crushed rock or gravel to ensure uniform support across the entire driveway base.
Key preparation elements include:
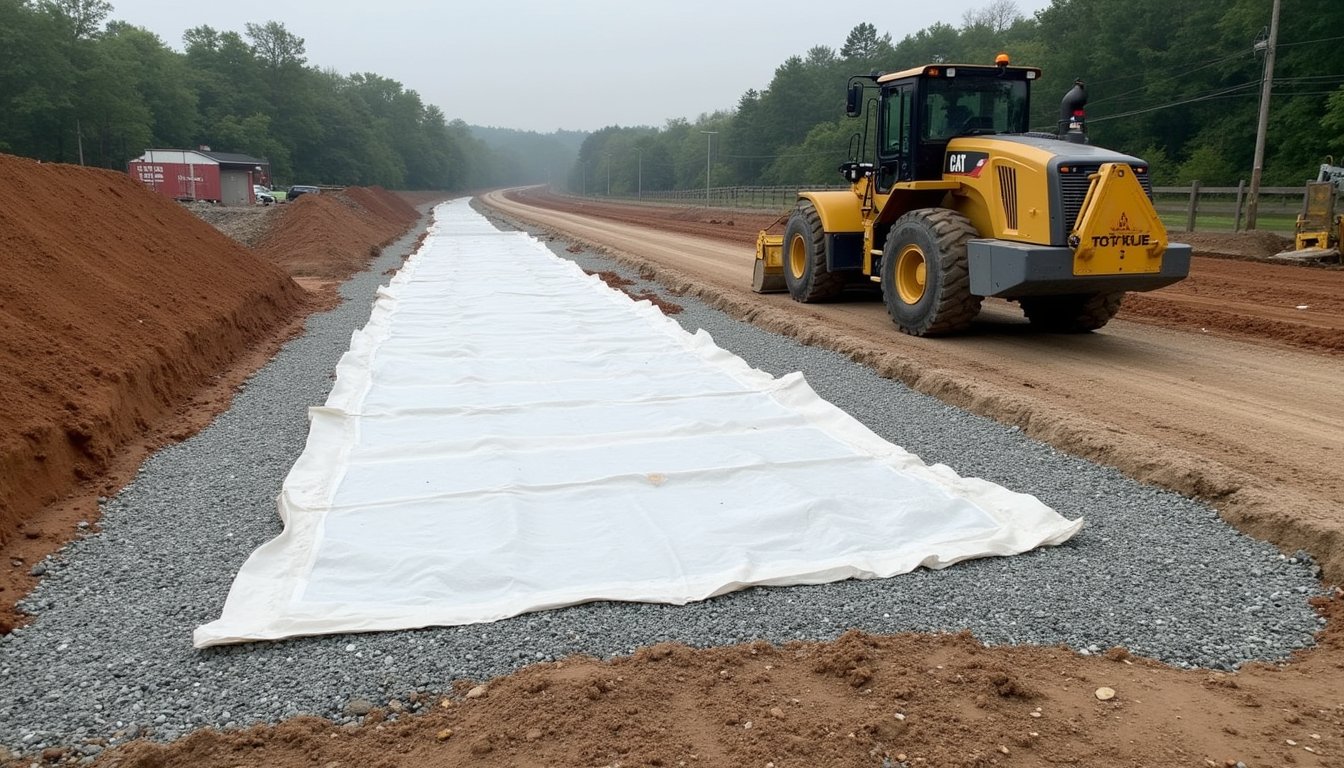
- Geosynthetic reinforcement installation beneath aggregate to prevent rutting and enhance stability
- Moisture conditioning to achieve optimum compaction levels
- Slope grading away from structures toward drainage systems
- Proof rolling to verify subgrade supports equipment and pavement loads
The subgrade must achieve stable compaction with no settling before any asphalt installation can proceed, as this foundation layer directly determines long-term pavement performance. Your contractor uses static or vibratory force during compaction, selecting the appropriate method based on the specific soil type encountered at your site.
Base Layer Installation
| Base Component | Specification | Purpose |
|---|---|---|
| Material Type | #3 stone, ¾” angular gravel | Load distribution, drainage |
| Layer Thickness | 4, 6 inches standard, 8, 12 inches heavy-duty | Structural support |
| Compaction Passes | 3, 4 minimum | Density, stability |
| Material Overage | 10, 20% above calculated volume | Accounts for settling, concrete shrinkage |
Geotextile fabric beneath prevents subgrade mixing while maintaining permeability for drainage management. Use powered compaction equipment to achieve the necessary density and prevent future settling of the base layer. The base should be sloped away from buildings to ensure proper water runoff and prevent pooling that could compromise the foundation. For enhanced stability in gravel applications, consider installing a gravel driveway grid system that distributes weight evenly and prevents shifting or rut formation.
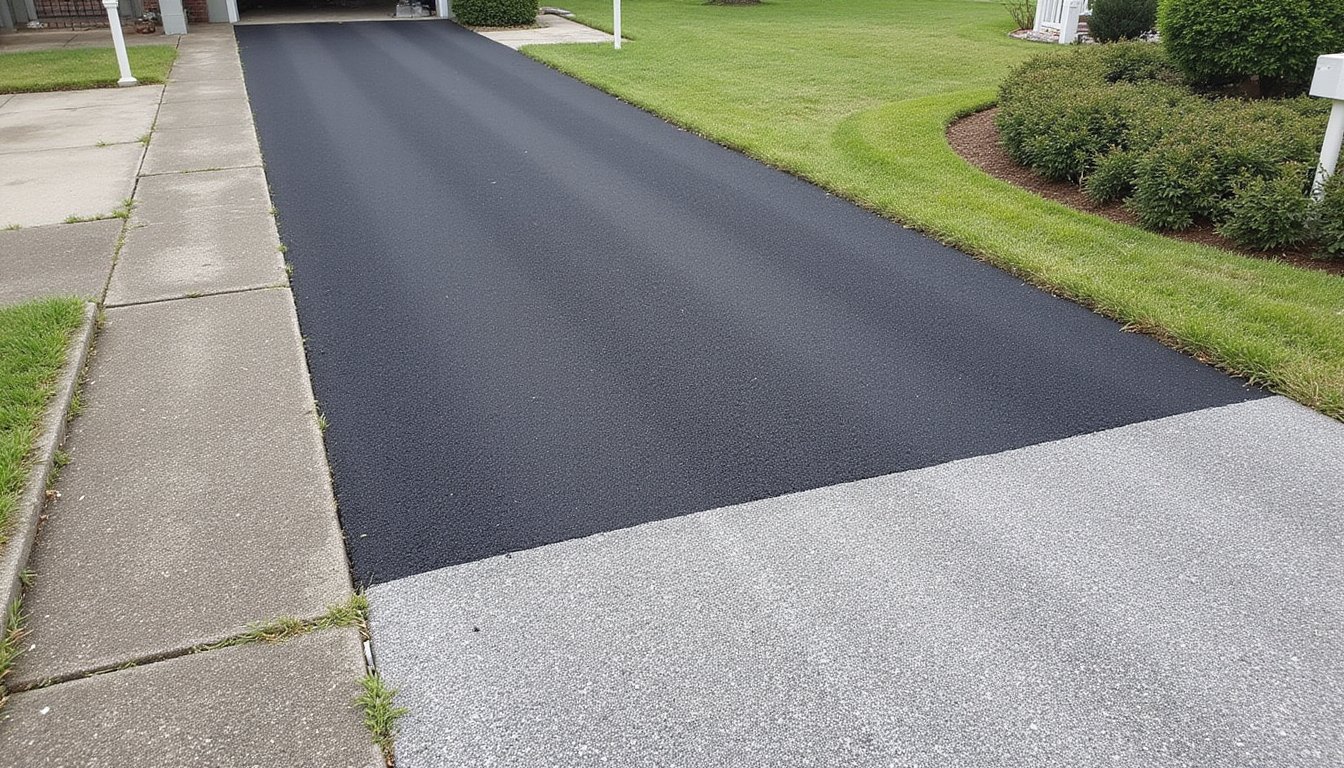
Surface Material Installation
With the base layer compacted and graded, the installation of your driveway’s surface material represents the final structural phase of the paving process. Your contractor will select an asphalt mixture design tailored to residential loads and climate conditions, typically incorporating finer aggregates for a smooth finish. The material arrives from the plant at 275, 300°F, requiring immediate deployment.
Laying technique optimization involves:
- Tack coat application to bond surface layers to the underlying base
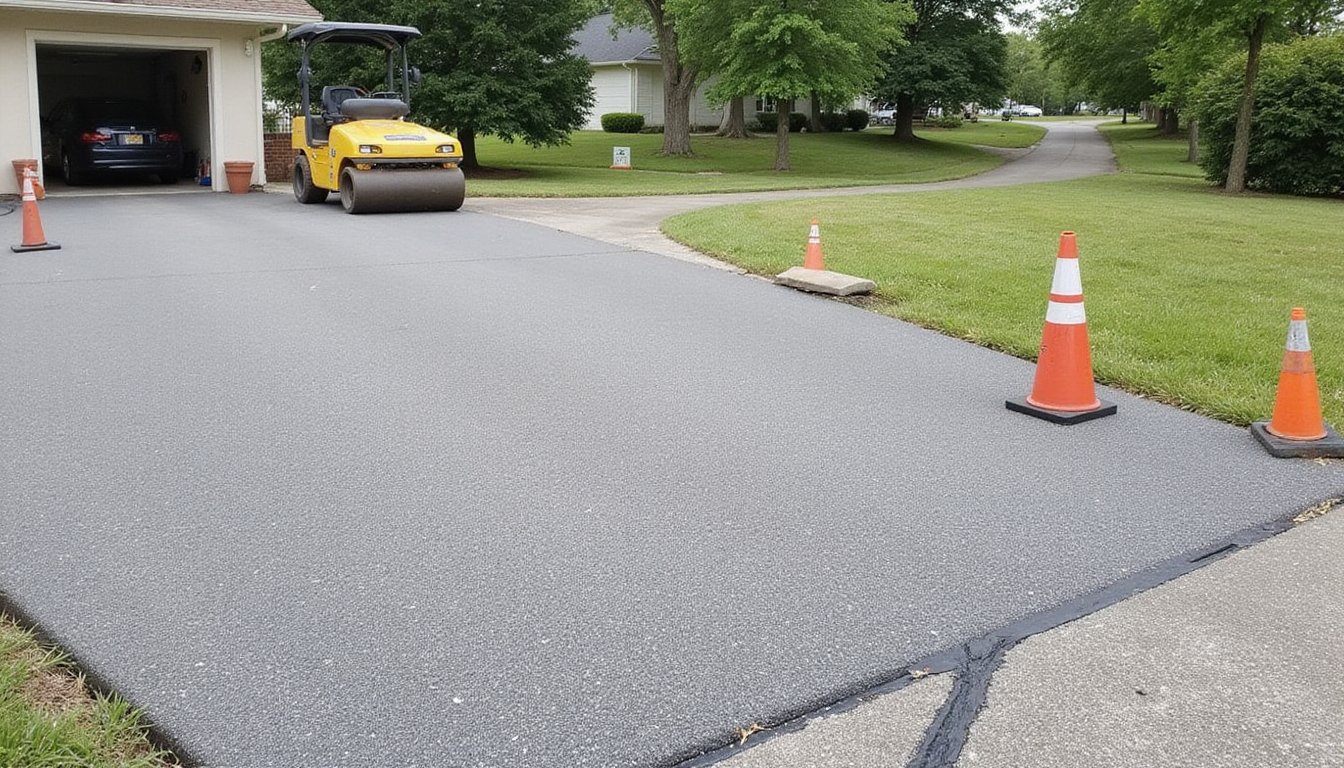
- Paving machine deployment in uniform rows at 2, 3″ thickness for residential driveways
- Temperature-controlled compaction between 275, 185°F using breakdown, intermediate, and finish rollers
- Multi-pass rolling sequence achieving 95% lab maximum density to guarantee durability, correct drainage slope, and surface longevity.
Following compaction, the asphalt must undergo a curing period of 24-48 hours before vehicle traffic is permitted, allowing the material to properly set and achieve its designed structural integrity. Professional installation typically consists of a 2.5-inch binder course with larger aggregate followed by a 1.5-inch surface course of finer material to create the optimal layered structure for long-term performance. After the pavement has fully cured, final sealing should be applied to protect the surface and extend its lifespan.
Finishing, Curing & Quality Control
After the surface material reaches proper compaction density, your contractor initiates the finishing phase, a critical sequence that transforms the structural pavement into a fully functional driveway surface. Final rolling achieves uniform texture while compacting edges for watertight movements. Surface flaws are corrected immediately, and joints are sealed to prevent water infiltration.
| Process Component | Key Requirements |
|---|---|
| Hot Mix Asphalt Curing | 24, 48 hours (foot traffic); 3, 7 days (vehicles) |
| Concrete Curing | Moisture retention via compounds, burlap, or plastic sheeting |
| Temperature Monitoring | Tracked during curing to prevent defects |
| Humidity Monitoring | Controlled to guarantee proper setting |
| Quality Verification | Thickness, compaction, grading, joint seals inspected |
Your contractor measures layer thickness, inspects drainage grading, and verifies joint continuity, making certain compliance with structural standards before project completion. Professional contractors may recycle old asphalt materials from demolition phases, promoting environmental sustainability while reducing project costs. The bitumen binder in asphalt provides exceptional flexibility and resistance to weathering, ensuring long-term durability of the finished surface. Precision grading equipment creates the appropriate slope to direct water away from the surface, preventing long-term damage such as cracks and potholes.
Frequently Asked Questions
How Much Does Professional Driveway Paving Typically Cost per Square Foot?
You’ll typically pay $3, $15 per square foot for professional driveway paving, though cost factors like site preparation, labor rates, and location drastically impact final pricing. Your material options determine the range: asphalt runs $3, $7, concrete $5, $15, gravel $1, $3, and pavers $10, $30 per square foot. Professional installation adds $3, $7 per square foot to material costs. Larger driveways often secure lower per-square-foot rates, while complex site conditions increase expenses.
What Permits or Approvals Are Required Before Starting a Driveway Project?
You’ll need to start by obtaining local building permits from your municipality, which typically costs around $25 and requires submitting detailed site plans 30 days before construction. If you’re connecting to state highways, you must secure a Highway Occupancy Permit from PennDOT. Additionally, securing homeowners association approval is essential if applicable. Don’t forget to call PA-One (811) before excavation for utility marking, and verify stormwater management requirements if your project exceeds 400 square feet.
How Long Should I Wait Before Parking Vehicles on My New Driveway?
Wait 7 days minimum before parking on concrete driveways, as curing time reaches 70, 90% strength; heavy vehicles require 28, 30 days for full weight capacity. For asphalt, wait 3, 7 days, avoiding the hottest hours and repeated parking in identical spots. Temperature and thickness affect curing time substantially. You’ll prevent surface damage by distributing loads with plywood during early parking. Don’t park near edges until complete cure, ensuring maximum durability and structural integrity.
What Is the Best Driveway Material for Cold Climates With Freeze-Thaw Cycles?
For cold climates with freeze-thaw cycles, you’ll find permeable pavers offer superior performance, lasting up to 60 years with minimal cracking. However, properly formulated asphalt mixtures with flexible binders provide excellent freeze-thaw resistance at lower costs. If you prefer concrete, specify air-entrained concrete reinforcements with 4-6% air content and steel mesh to accommodate expansion. Avoid standard concrete without additives; it’s highly vulnerable to freeze-thaw damage and requires professional installation with proper drainage systems.
How Often Should I Reseal or Maintain My Driveway After Installation?
You’ll need to establish a re sealing frequency of every 2, 3 years for asphalt driveways in moderate climates, though your maintenance schedule should adapt based on traffic levels and environmental conditions. Wait 6, 12 months after installation before the first seal to allow proper curing. Conduct annual inspections to assess surface wear, checking for fading, cracks, and water absorption. High-traffic areas require resealing every 1, 2 years, while low-traffic zones can extend to 4, 5 years between applications.