


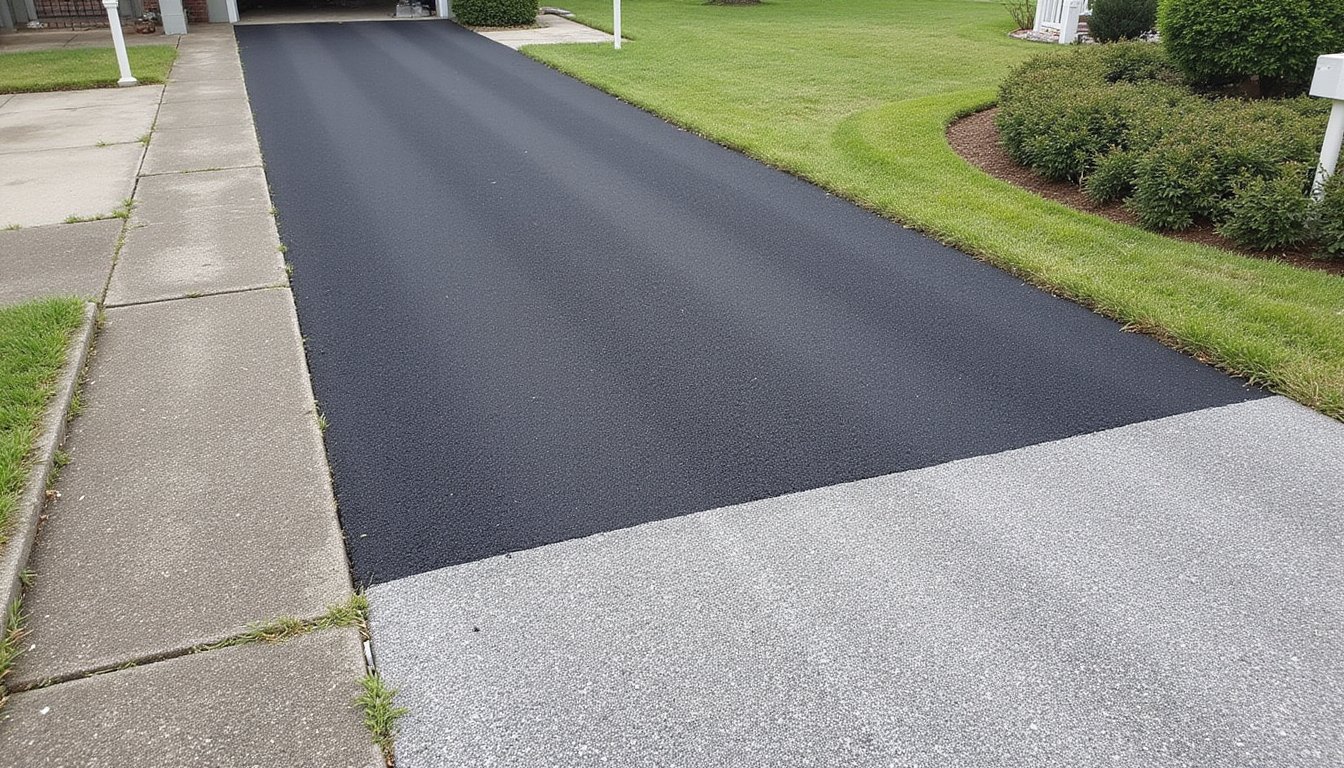
To repair your cracked concrete driveway like a pro, you’ll need to assess the damage scope, gather essential tools and safety equipment, and select appropriate repair materials like rapid-setting mortars and bonding agents. Clean cracks thoroughly with a wire brush and pressure washer, then shape them into a reverse V-pattern for ideal bonding. Apply crack filler, smooth the surface, and finish with a protective sealant. The following steps will guide you through each phase of the process.
Assess the Damage and Determine Repair Scope

When should you repair your cracked concrete driveway? You’ll need to act immediately when you spot visible cracks, sunken areas, or flaking surfaces. These conditions create tripping hazards and compromise structural integrity.
Start by categorizing your damage severity. Small cracks and minor holes typically qualify for DIY repairs, while extensive cracking or sunken sections require professional contractor assessment. Surface-level damage with multiple shallow cracks often warrants complete resurfacing rather than individual patching.
You must evaluate root causes before selecting your repair method. Heavy vehicle loads, soil settling, erosion, and water infiltration commonly trigger concrete failure. Understanding these factors helps you prevent recurring damage and avoid costly mistakes. Unaddressed voids beneath your slab can lead to complete slab failure if left untreated. Porous concrete is particularly vulnerable because repeated water evaporation creates capillary cracks that worsen over time.
Document the damage extent thoroughly, this assessment guides your repair methodology and budget planning decisions. For complex structural concerns, professionals may use nondestructive test methods like ground penetrating radar or impact echo testing to locate hidden voids and delaminations before recommending repairs.
Gather Your Tools and Safety Equipment
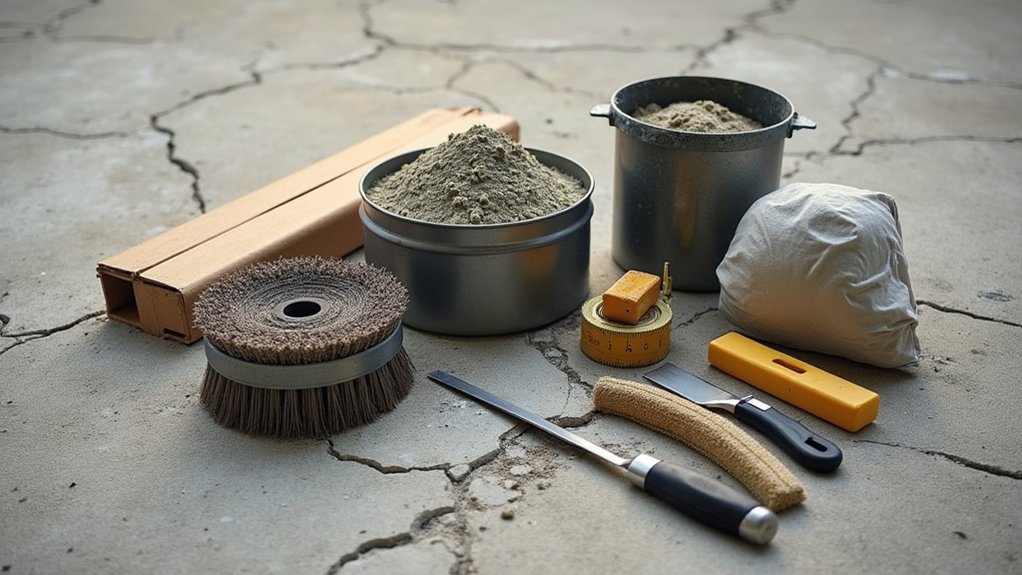
Before you begin any concrete repair work, you’ll need to assemble the right tools and safety gear to safeguard efficient, protected execution of your project. Start with a thorough equipment inventory to confirm you have everything on hand.
| Essential Tools | Measurement Tools | Safety Equipment |
|---|---|---|
| Shovel #2 scoop | Tape measure | Safety glasses |
| Pour pot with legs | Straightedge/screed | Work gloves |
| Groove cutter | Level | Dust mask |
| Concrete broom | Laser level | Work boots |
Conduct a part inspection of each tool before starting. Check your pour pot’s adjustable nozzle for clogs and verify your groove cutter’s blade condition. For applying sealant into cracks, keep a disposable 18″ sealer brush with handle ready for precise application. Don’t skip hearing protection if you’re operating a walk-behind saw or concrete grinder during your repair work. Remember that rubber work gloves are essential since raw concrete contains caustic compounds that can cause burns and skin irritation with extended contact. Using the right equipment directly impacts your project outcomes, so investing in quality tools will help ensure a long-lasting, professional-looking driveway repair.
Collect the Right Repair Materials
Selecting the correct repair materials determines whether your fix lasts months or decades.
Choosing the right repair materials isn’t just about fixing today, it’s about building durability that stands the test of time.
For horizontal driveway surfaces, you’ll need rapid-setting repair mortars like Lyons Patchcrete or WR Meadows Spectrum Rekote, which achieve 3,000 psi compressive strength within 24 hours. Mapei Quickpatch excels specifically for crack filling applications.
Don’t overlook bonding agents, they’re crucial for product compatibility. Grace Daraweld C works well for horizontal crack bonding, while Lyons P100 Primer indicates readiness when it changes from milky to clear during its 2-3 hour drying period. BASF A660 is another reliable bonding agent option to consider for your repair project.
For joints and smaller cracks, gather Adhesives Technology Crackbond JF Joint & Crack Filler. You’ll also need backer rod for cracks 1/4-inch wide, which supports the application process and guarantees proper sealant depth. Keep in mind that repair areas less than 6 inches in length and 1.5 inches in width should be filled with joint sealant material rather than concrete patch. Concrete patch repair materials are available at various price points, typically ranging from $21.00 to $57.00 depending on the product size and formulation you select.
Stock finishing sand to cover caulk-filled joints, enhancing long-term durability.
Clean and Clear Debris From Cracked Areas
With your materials assembled, you’ll shift focus to preparing the damaged areas for repair. Thorough surface preparation determines whether your filler bonds properly or fails prematurely.
Start by scrubbing cracks with a wire brush to dislodge dirt, vegetation, and loose concrete fragments. Target hairline cracks and shallow areas where debris accumulates. Next, use a leaf blower for quick dry removal of loosened material.
Follow up with a pressure washer to blast deep into cracks, clearing hidden grime that brushing missed. Lower PSI models work effectively for this task. Allow the concrete to dry completely before proceeding. Rushing this step compromises the repair, so choose optimal weather conditions with moderate temperatures for best results.
Inspect cleaned areas for remaining contaminants. If you discover deep cracks wider than a quarter or exceeding two inches in depth, the damage may be too severe for simple repairs and could require full removal instead. For cracks that are half an inch wide or deeper than one inch, plan to install backer rod before applying caulk to improve adhesion and save material. Establishing a seasonal maintenance schedule with annual pressure washing prevents future debris buildup and protects your repair investment.
Shape and Prepare Cracks for Optimal Bonding
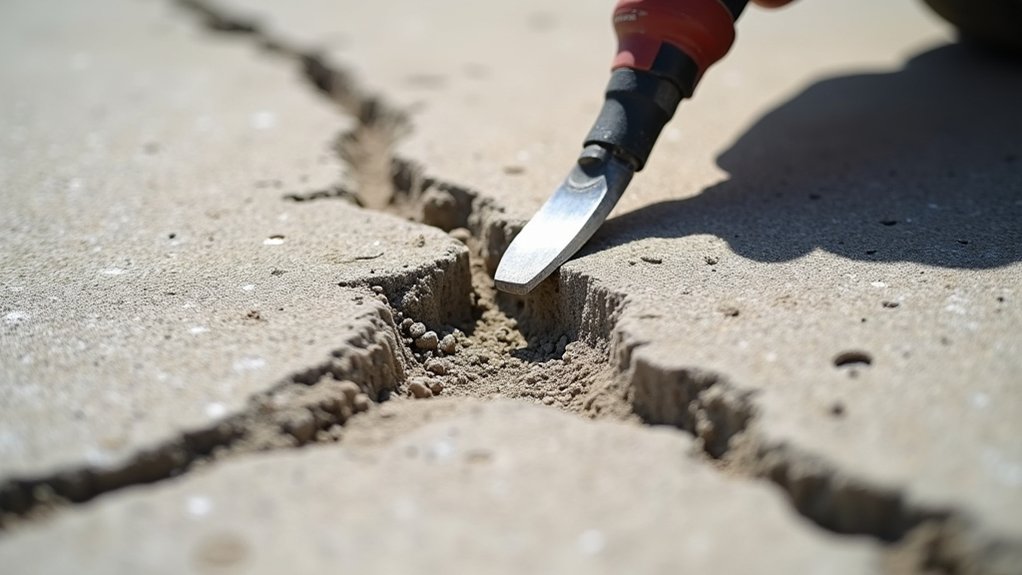
You’ll need to chisel a reverse V-shape into cracks wider than 1/8 inch, creating a wider bottom that locks patching material in place. After removing all loose concrete and debris from the undercut edges, use a nylon bristle cup wheel to guarantee clean surfaces for maximum adhesion. For deeper cracks, insert a backer rod 1/4 inch below the surface to provide a stable foundation that prevents sealant from sinking too deep.
Create Reverse V-Shape
Why does crack shape matter when repairing concrete? A reverse V-shape creates a mechanical bond that locks repair material into place, preventing rigid fillers from loosening during expansion and contraction cycles.
Using proper tooling techniques, grab a cold chisel and hammer or a diamond V-grinder on an angle grinder. You’ll undercut the crack’s sides, making the base wider than the surface opening. This chiseling v shape design creates a dovetail profile that grips patching compound securely.
Chisel to approximately one inch deep along the crack’s entire length. Work carefully to bevel edges consistently, centering your groove in the crack path. This technique suits cracks wider than 1/8 inch and works well for non-structural cracks that don’t require professional intervention. While hiring a contractor for crack repair can cost between five hundred to twelve hundred dollars per 8-10 feet, mastering this V-shape technique allows you to achieve professional results yourself.
After shaping, remove all debris with a wire brush and vacuum thoroughly before proceeding. You can also use a pressure washer or wet/dry shop vacuum to ensure the crack is completely free of loose material before applying patching compound.
Remove Loose Concrete
After shaping your V-groove, you’ll need to remove all loose concrete and debris to certify proper bonding. Start by using a wire brush to scrub the crack’s interior, eliminating dust and deterioration remnants. This creates essential traction for your patching compound.
Next, employ a chisel and putty knife to extract any remaining loose material along the edges. For efficient debris gathering, use a shop vacuum to pull out fine particles that brushing leaves behind. This step is vital for small cracks where residue accumulates.
Complete your thorough cleaning verification by inspecting the crack visually and running your finger along the surface. You shouldn’t feel loose fragments or grit. The crack must be completely clean and dry before applying any repair materials to validate maximum adhesion strength. Before proceeding, dampen the area with water to saturate the concrete, which will help the bonding agent adhere properly to the surface.
Insert Backer Rod
Before applying sealant, you’ll need to assess whether your crack requires a backer rod, a foam cylinder that controls sealant depth and prevents three-sided adhesion failure. Cracks deeper than 1/2 inch benefit most from this support structure.
Select closed-cell foam backer rods slightly larger than your crack width for uniform compression. Standard 3/8-inch diameter rods work well for typical residential applications, though varying crack widths may require multiple sizes.
Using a sharpened carpenter’s pencil or similar tool, push the rod into the crack. Proper insertion depth sits approximately 1/4 inch below the surface, don’t exceed 3/8 inch, as this affects sealant curing. The rod should fit snugly without gaps, preventing it from floating when you apply sealant. Verify consistent depth along the entire crack length.
Insert Backer Rod for Deep or Wide Cracks
Most deep or wide cracks in concrete driveways require backer rod installation before you apply sealant. To select appropriate backer rod, choose closed-cell foam that’s 20-25% larger than your crack width. This sizing creates a snug fit and prevents the rod from floating during sealant application.
To guarantee proper backer rod installation, press the foam into the crack using a shaved carpenter pencil or blunt tool. Position it 1/4 to 1/2 inch below the surface, leaving adequate depth for your sealant bead. For cracks exceeding 1/2 inch depth, install the rod in layers until you reach the correct level.
The backer rod serves as a bond breaker, preventing sealant adhesion to the crack bottom. This allows flexibility for natural concrete movement while reducing material waste.
Dampen the Surface for Better Adhesion
Before applying your repair compound, lightly mist the crack and surrounding concrete with water to achieve a saturated surface dry (SSD) condition. You’ll want to dampen the pores without creating standing water, as over-saturation weakens the bond and dilutes your repair material. Time your application so the surface remains damp but not wet when you’re ready to apply the filler.
Light Misting Technique
After you’ve cleaned the crack and applied your repair material, light misting becomes essential for achieving a strong, lasting bond between the sealant and concrete. Damp concrete adhesion relies on proper surface moisture that prevents rapid drying and supports the chemical hydration process.
Use a spray bottle to apply a fine mist directly onto powder-filled cracks. Activate the material without creating puddles or saturation. Maintain consistent moisture levels by misting up to 10 times daily during the first week, especially in hot conditions.
Avoid working in direct sunlight where concrete temperatures can reach 120°F. Shaded areas stay 8-10°F cooler, providing better curing conditions. For extended moisture retention, cover repairs with damp burlap or plastic sheeting between misting sessions. Continue this routine for 7-10 days to achieve peak strength.
Avoid Over-Saturation
While proper moisture promotes strong adhesion, too much water creates the opposite effect, weakening your repair and causing premature failure. Understanding over saturation risks helps you achieve ideal results without compromising structural integrity.
Standing water on your concrete surface dilutes the repair material, reducing its compressive strength considerably. The improper curing effects include incomplete hydration of cement particles, which leads to a weaker bond between the patch and substrate.
You’ll also notice increased shrinkage in over-saturated repairs, causing the material to pull away from edges and create gaps. Excess moisture traps air within the mixture, promoting delamination over time.
Before applying your repair material, wipe away any pooled water with a clean cloth. The surface should appear uniformly damp, not wet or shiny, ensuring successful adhesion without moisture-related complications.
Timing Before Application
Timing your surface dampening correctly makes the difference between a lasting repair and one that fails prematurely. After pressure washing your concrete surface, you’ll need to allow adequate drying time before applying repair materials. A damp surface prevents proper material adhesion, so don’t rush this critical step.
Check that your concrete feels dry to the touch but retains slight moisture in the pores. This condition creates ideal bonding between the existing surface and new repair compounds. If you’re applying multiple layers, observe the proper curing duration between coats, typically 2-4 hours per layer.
Temperature also affects your timing before application. Avoid working when temperatures drop below 10 degrees Celsius, as cold conditions compromise the curing process and prevent proper concrete matrix formation.
Apply Crack Filler and Patching Compound
Fill cracks completely but avoid over-mounding, keep material slightly below the slab surface to protect it from traffic damage. Always follow manufacturer mixing instructions for two-part products.
Smooth and Blend Repairs With Existing Concrete
Once you’ve applied your crack filler and patching compound, you’ll need to smooth and blend the repairs so they integrate seamlessly with your existing driveway surface. Proper trowel techniques, combined with texture matching methods, guarantee your repairs won’t stand out as obvious patches. These professional finishing tips will help you achieve durable results that maintain both the structural integrity and visual consistency of your concrete.
Trowel Smoothing Techniques
After you’ve filled the crack with patching compound, proper trowel technique becomes essential for creating a durable, visually seamless repair.
Begin by holding your trowel at a slight angle, starting at one end of the repair area. Apply consistent, even pressure while pushing forward with smooth motions. Overlap each pass slightly to achieve uniform coverage. Trowel angle adjustment is critical, progressively increase the angle as the concrete sets to enhance smoothness.
Employ troweling pattern variations by tipping the trowel alternately when moving forward and backward. This technique eliminates marks and imperfections from prior passes. Reduce pressure gradually with each subsequent pass as the material firms up.
Avoid over-troweling, which causes surface defects and structural weakening. Wipe your trowel periodically to remove buildup that compromises finish quality.
Texture Matching Methods
Because even the smoothest trowel work won’t hide a repair that doesn’t match your driveway’s original appearance, you’ll need to employ texture matching methods that blend the patched area with surrounding concrete.
Lab based concrete matching delivers the most accurate results. You’ll supply samples of your existing cement, sand, and aggregate to a testing facility. This approach requires your concrete producer’s original mix design records.
To achieve stain color uniformity across repaired sections:
- Test water-based stains on inconspicuous areas before full application
- Mix multiple stain colors to replicate your driveway’s exact shade
- Apply pigmented sealers for subtle color corrections
- Use acid etching to remove surface defects that affect color matching
Remember that curing conditions and weather variables prevent guaranteed perfect matches, even with precise laboratory analysis.
Professional Finish Tips
Before you apply any filler material, you’ll need to address uneven concrete slabs that could compromise your repair’s longevity. Slabjacking or lifting foam can raise sunken sections to proper alignment, ensuring your repair sits flush with surrounding concrete.
Your surface preparation steps determine the final result. Cut your caulk nozzle at a 45-degree angle, slightly smaller than the crack width. Apply caulk just below the slab surface to protect it from traffic damage. Spray soapy water on non-sag caulk, then smooth it with a gloved finger.
For seamless blending, sprinkle dry sand over wet caulk to match existing concrete texture. Follow proper curing technique by maintaining temperatures between 50-80°F and protecting repairs from moisture. Allow full cure time before permitting foot or vehicle traffic.
Seal Your Driveway for Long-Term Protection
Once you’ve completed all crack repairs, sealing your driveway provides essential protection against future damage and extends the life of your concrete. Before applying sealer, guarantee your surface is completely clean and dry, wait 24-48 hours after pressure washing.
Sealing your driveway after crack repairs is the key to long-lasting concrete protection.
For optimal long term maintenance, follow these essential steps:
- Test for existing sealer by dropping water on the surface; absorption indicates readiness for application
- Apply thin, even coats using a garden sprayer or roller with overlapping strokes
- Allow 24-48 hours of curing time before foot or vehicle traffic
- Check manufacturer warranty considerations for specific temperature and humidity requirements
Deep-penetrating sealers block water, oil, and salts at the millimeter level, preventing future cracking. Reapply periodically and clean regularly to maintain your driveway’s protective barrier against weathering and stains.
Frequently Asked Questions
Can I Repair My Concrete Driveway in Cold or Freezing Weather Conditions?
You shouldn’t repair your concrete driveway in freezing temperatures because the curing time becomes compromised. When temperatures drop below freezing, concrete can’t hydrate properly, creating weak bonds that’ll fail quickly. Instead, you’ll want to use cold weather concrete mixes or protect fresh repairs with heat blankets. For safety, seal existing cracks before winter and apply calcium magnesium acetate rather than traditional de-icing salts to prevent further damage.
How Long Should I Wait Before Driving on My Repaired Driveway?
You should wait at least 7 days before driving light vehicles on your repaired driveway, though 10 days offers better durability. For trucks or heavy vehicles, wait the full 28-30 days. Curing time requirements depend on temperature, ensure conditions stay above 50°F for ideal strength development. Proper surface preparation before repair also affects how well the concrete bonds and cures. Avoid driving on edges or pivoting wheels during this critical period.
Will Repaired Cracks Eventually Become Visible Again Over Time?
Yes, repaired cracks can become visible again over time due to freeze-thaw cycles, temperature fluctuations, and ongoing concrete movement. Your repair longevity depends heavily on seasonal considerations, harsh winters accelerate deterioration as moisture penetrates and expands within cracks. You’ll extend your repairs’ lifespan by applying a penetrating sealer every 2-3 years and addressing new cracks promptly. With consistent maintenance, you can expect quality repairs to last 10+ years before requiring attention.
What Causes Concrete Driveways to Crack in the First Place?
Your concrete driveway cracks due to several factors. Soil expansion and contraction beneath the slab creates uneven support, while inadequate drainage allows water infiltration that worsens during freeze-thaw cycles. You’ll also see damage from poor installation practices, including insufficient base compaction and improper joint spacing. Heavy vehicle loads exceeding the slab’s design capacity, temperature fluctuations, and tree root intrusion all contribute to cracking. Always address drainage issues first to prevent recurring damage.
Should I Repair Cracks Myself or Hire a Professional Contractor Instead?
You should weigh DIY repair challenges against professional expertise advantages before deciding. If you’re tackling small, superficial cracks, DIY methods can save money, expect $20 to $50 for basic materials. However, 70% of DIY repairs fail within one year due to improper preparation. For structural damage or recurring issues, hire a contractor. They’ll diagnose root causes, use specialized equipment, and deliver 90% success rates over five years with warranty protection.