
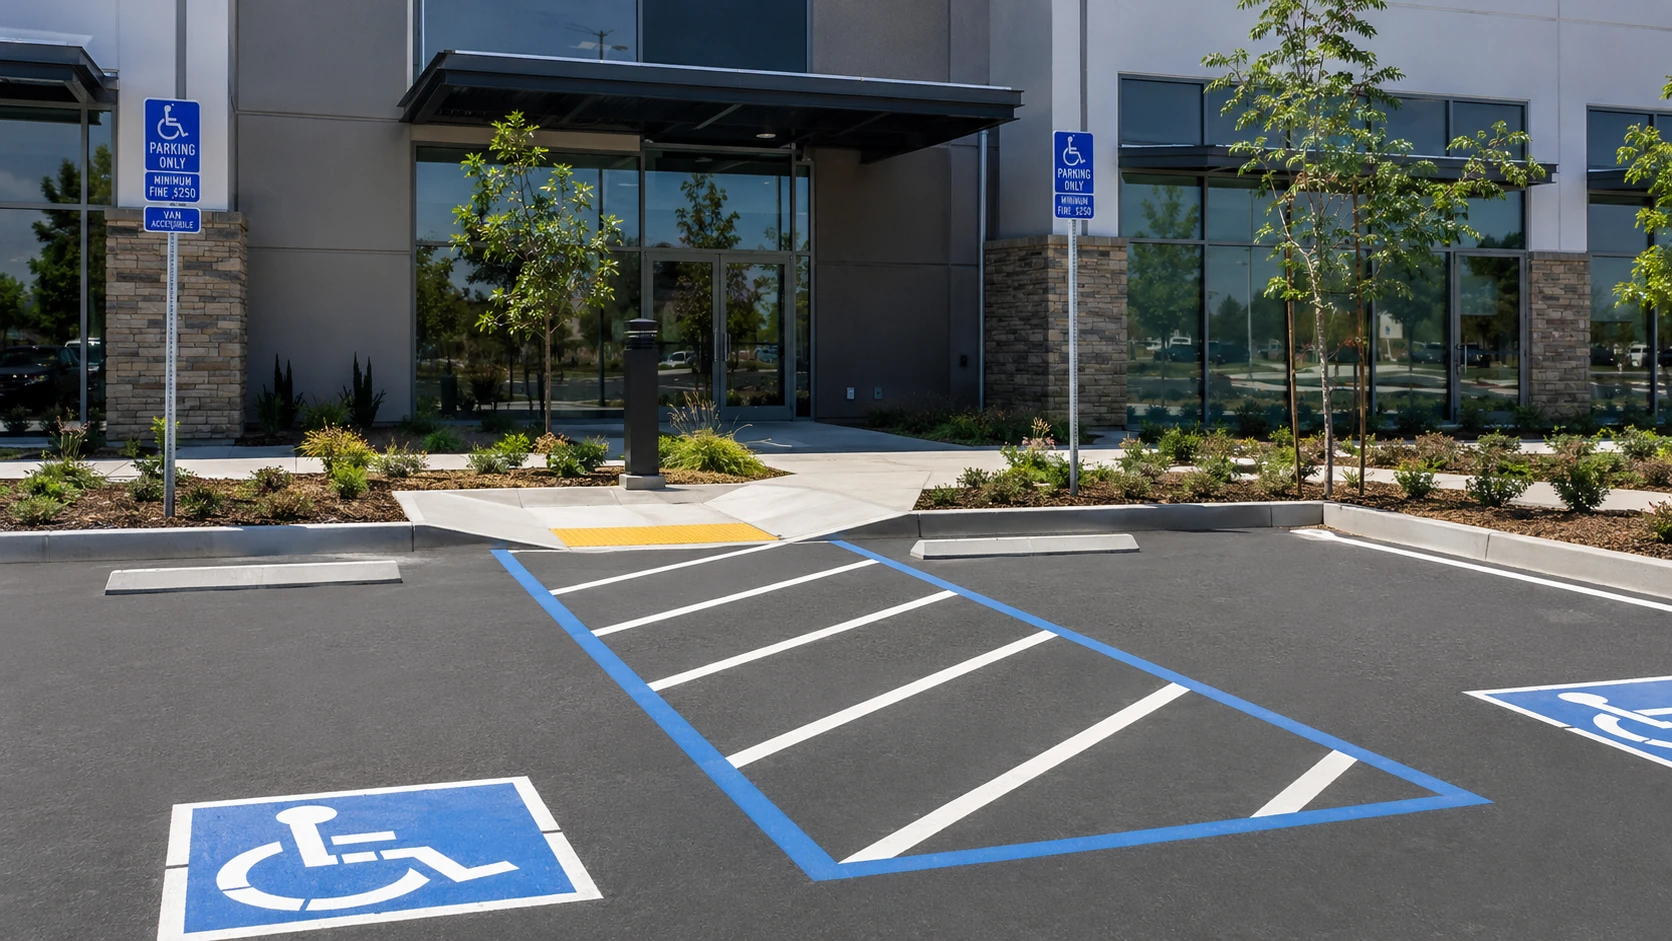


To repair crumbling driveway edges, you’ll need to assess crack patterns and drainage issues, then clear all debris and eliminate weeds with herbicide or boiling water. Remove deteriorated material down to solid pavement, cut clean vertical lines into sound asphalt, and compact the exposed gravel base. Apply cold patch in 1-inch lifts, compact thoroughly, and install protective edging. The complete process below walks you through each critical step.
Assess the Extent of Edge Damage and Cracking
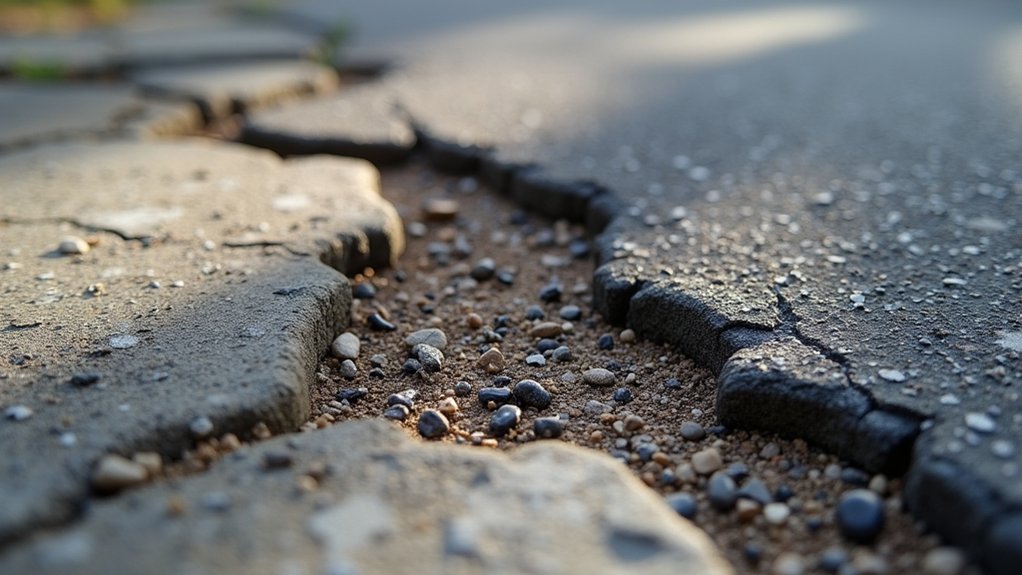
Before you grab repair materials, take time to thoroughly evaluate your driveway’s edge condition. Start by conducting a systematic visual examination across all sections, comparing stable areas against compromised zones. Look for telltale indicators: crumbling or flaking surfaces, inch-wide longitudinal cracks, and noticeable dipping along borders.
You’ll need to evaluate degree of cracking by checking for air pockets, gaps, and uneven shifts where asphalt meets landscape. Standing water near the perimeter signals drainage failure requiring immediate attention. Pay close attention to areas where grass and weeds growing into the edge line indicate long-term neglect and structural weakness.
Next, inspect foundation integrity by examining crack patterns that reveal underlying soil erosion or base instability. Assess loose gravel migration and edge drop-offs caused by traffic wear or freeze-thaw cycling. These cracks typically run parallel to the pavement’s edge and spread inward over time if left unaddressed. Document material composition, pavement age, and slope grading, these factors directly influence your repair strategy and material selection. Remember that with proper maintenance, asphalt driveways can last 15-20 years, making early edge repairs a worthwhile investment in your pavement’s longevity.
Clear Debris and Weeds From Damaged Areas
Before applying any repair materials, you’ll need to thoroughly clear all loose debris from the damaged edge areas using a stiff-bristled broom or leaf blower, working from the farthest point toward your exit. Once you’ve removed surface material, apply a non-selective herbicide to any weeds growing in cracks and expansion joints, allowing adequate dwell time for complete root kill. Follow up with aggressive wire brush cleaning to remove remaining dirt, loose aggregate, and deteriorated concrete particles from all repair surfaces. If you notice deep cracks wider than a quarter or deeper than two inches during this inspection, the damage may be too severe for edge repair and could require full replacement instead. For smaller driveways, manual sweeping can be a time-consuming but effective option to ensure all loose rocks and debris are completely cleared before repairs begin.
Remove Loose Debris First
When you’re preparing crumbling driveway edges for repair, clearing all loose debris and vegetation is the critical first step that ascertains whether your patch will hold or fail within months.
Start with a stiff-bristled broom to sweep loose asphalt, dirt, and stones from damaged sections. For dust control, use a leaf blower on low setting rather than dry sweeping, which disperses particulates. A wire brush effectively dislodges embedded material from cracks and deteriorated edges.
Target weeds growing through fissures, pull them completely, roots included. Applying weed killer before removal helps prevent regrowth that could compromise your repair. Extract remaining debris from crevices using a screwdriver or shop vacuum. For stubborn grime and oil stains, pressure washing provides thorough removal. Water removal afterward is essential; allow complete drying before applying any repair materials to guarantee proper adhesion and bond strength. Since standing water can weaken the driveway material and lead to further deterioration, ensuring the surface is completely dry is non-negotiable before proceeding. Addressing crumbling edges promptly is important because they often indicate underlying structural issues that will worsen without intervention.
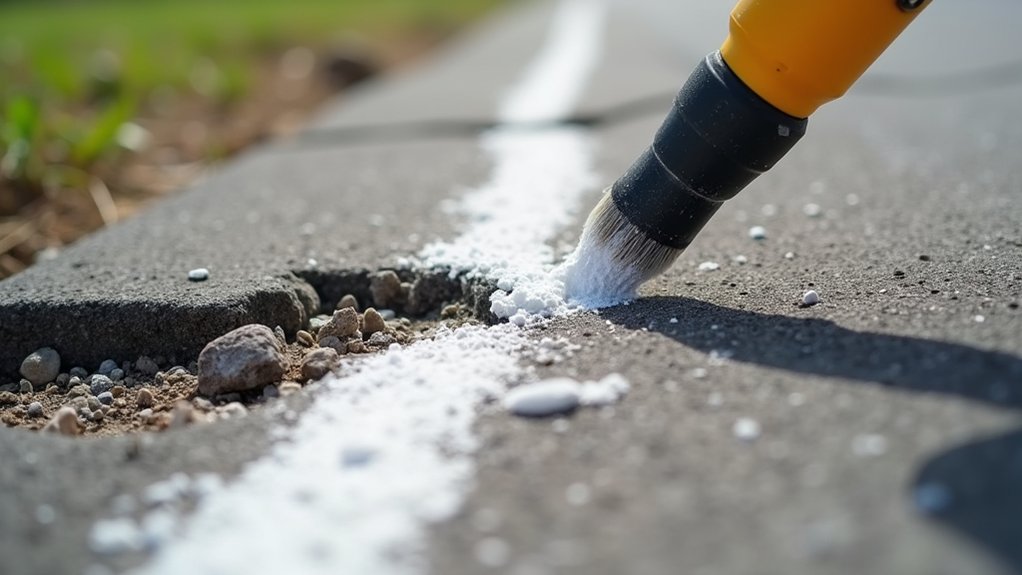
Apply Weed Killer Treatment
After clearing loose debris from your crumbling driveway edges, you’ll need to eliminate any remaining weeds and prevent regrowth before applying repair materials.
For effective weed prevention methods, select your treatment based on application requirements:
| Treatment Type | Application Method |
|---|---|
| Glyphosate (41%) | Mix in pump sprayer, coat leaves until wet without runoff |
| Vinegar Solution | Combine white vinegar with dish soap and salt, spray directly |
Apply glyphosate on calm days to minimize drift, using a fan or cone spray pattern for spot treatment. You’ll see results within 2-4 days. For alternative weed control strategies, pour boiling water directly into cracks for instant elimination. This method can reach and kill the taproot, permanently removing weeds without chemicals. You can also apply plain salt between cracks, as it absorbs water from surrounding soil and deters plant growth long-term.
Keep treated areas clear until dry. Remove dead vegetation manually before proceeding with crack repair.
Wire Brush Thorough Cleaning
Proper wire brush selection depends on your driveway material, use stiff nylon brushes for concrete surfaces to prevent scratching, while standard wire brushes work best for asphalt cracks where you’ll need aggressive action to dislodge embedded vegetation and debris.
Apply your heavy duty bristle scrubber in overlapping circular motions to penetrate compacted soil and moss between paving stones. An electric rotary brush delivers superior results, powering through stubborn grime in minutes.
Essential brushing protocol:
- Dampen the surface with a garden hose to soften embedded grime before scrubbing
- Work the brush along pothole edges to clear dust and loose material
- Collect all pulled weeds and debris with a dustpan immediately after brushing
Rinse thoroughly from top downward to flush loosened contaminants and prevent residue streaking. Allow the surface to dry completely before applying any repair materials, which may take 24-48 hours depending on weather conditions. After clearing all debris from joints and cracks, refill gaps with kiln-dried sand to prevent weeds from re-establishing in the cleaned areas. This thorough cleaning process matters because soils, oil, and moss block adhesion, so removing them restores texture for proper bonding when you apply coatings and repair materials.
Remove Loose Asphalt and Crumbling Material
Before applying any patching compound, you’ll need to excavate all deteriorated material down to a stable base. Use a cold chisel and hammer to chip away crumbling sections along the damaged edge. Work methodically to extract loose asphalt patches completely, ensuring you’ve reached solid pavement underneath.
Focus on creating vertical sides with the bottom of your excavation slightly wider than the top surface opening. This profile helps the repair material lock mechanically into place. Avoid angled cuts that compromise patch adhesion.
Once you’ve removed all unstable material, compact the exposed gravel base using a vibratory plate compactor. This step establishes a firm foundation that prevents future settlement. Inspect the cavity thoroughly, any remaining loose aggregate will undermine your repair’s longevity. Since edge cracks often result from inadequate drainage and poor underlying layers, addressing these issues during excavation ensures your repair won’t fail prematurely. Addressing cracks promptly during this preparation stage helps prevent water from penetrating deeper into the base layer and causing additional structural damage. Remember that proper edging transfers stress from the asphalt surface to the solid ground beneath, which is why establishing this stable base is so critical to a lasting repair.
Mark and Cut Straight Lines Along Damaged Edges
Once you’ve cleared all deteriorated material, you’ll need to establish clean, straight boundaries that extend slightly into sound pavement, this guarantees your patch bonds to solid asphalt rather than compromised edges.
Measure edges precisely using a chalk line snapped along the pavement, or pull a rope taut between endpoints and mark with paint. Score along these lines using a hammer and old screwdriver to create perforations that prevent blade wandering during cutting.
Essential cutting steps:
- Secure straight cut guide marks by denting chalk lines before sawing
- Set your asphalt saw’s blade depth to match pavement thickness
- Never turn the saw while the blade runs, lift at line ends, reposition, then continue
Square edges outperform round patches for long-term durability.
Level the Sub-Base and Prepare the Foundation
Why does sub-base preparation matter so much for edge repairs? A compromised foundation guarantees premature failure, regardless of surface quality. Start by probing the sub-base with a screwdriver to identify voids, soft spots, or erosion extending 4-6 inches deep.
Excavate unstable material down to firm sub-grade, removing all organic debris. For drainage considerations, you’ll need to establish a 1-2% slope directing water away from structures. Spread quarry processed stone or sharp sand, 1-2 inches for minor leveling, 4-6 inches for deeply compromised areas.
Compact uniformity is essential for preventing future settling. Use a plate compactor for larger zones or a dead blow hammer for areas under one square meter. Apply overlapping passes until you achieve rock-solid density, then verify level across the entire repair area.
Add Gravel Base for Deeper Repairs
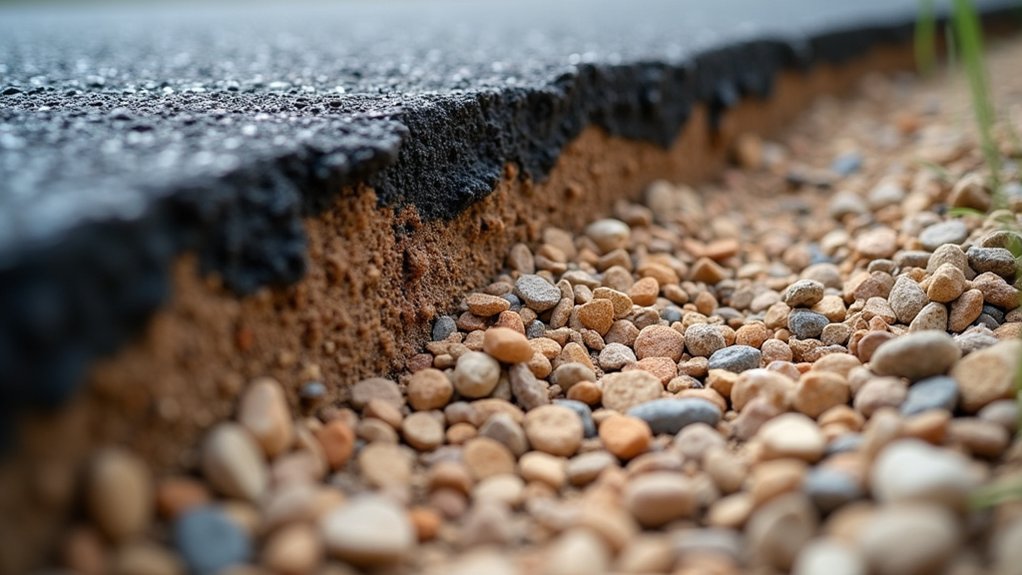
When excavated areas exceed 4 inches deep, you’ll need a proper gravel base layer before applying surface materials. Appropriate gravel selection starts with 3/4-inch minus crushed road base, which contains the ideal mix of stone and fine particles for maximum binding strength.
Essential steps for gravel base installation:
- Spread crushed gravel evenly across excavated sections, overfilling by one inch above the surrounding driveway level to accommodate settling.
- Apply light water misting to help fine particles migrate into voids between larger stones.
- Achieve consistent gravel compaction using a vibrating plate compactor or multiple vehicle wheel passes over filled areas.
Feather new material beyond repair edges to create seamless integrations with existing surfaces. This foundation work prevents future pothole formation and extends your driveway’s structural durability.
Apply Cold Patch or Hot Mix Asphalt Filler
Most driveway edge repairs require cold patch asphalt for their accessibility and forgiving application process. Before application, remove all debris, loose stones, and standing water from the damaged area. Square-cut vertical edges to guarantee proper confinement of the patch material.
Pour cold patch into the prepared cavity, overfilling by 2-3 inches above the surrounding surface. For depths exceeding 2 inches, proper application techniques demand working in 1-inch lifts, compacting each layer thoroughly before adding subsequent material. This eliminates air pockets and maximizes adhesion.
Compact using a metal tamper, vehicle wheel, or vibrating plate until level with existing pavement. Curing considerations include allowing 24 hours minimum before heavy traffic and waiting 30 days before applying driveway sealer. Higher ambient temperatures accelerate the hardening process rapidly.
Compact the Patched Areas for a Smooth Finish
Achieving proper compaction determines whether your edge repair lasts one season or ten years. Proper equipment selection directly impacts patch density and longevity. You’ll need to match your tool to the repair scope, vibratory plate compactors deliver consistent results for most edge repairs, while hand tampers work for tight spaces.
Essential Compaction Steps:
- Apply initial hand-shovel compaction to begin material consolidation before mechanical finishing
- Use plate compactors to eliminate voids and achieve uniform density across the patched section
- Verify surface levelness with surrounding pavement to prevent water pooling and tripping hazards
Adequate compaction force levels prevent premature failure by removing air pockets throughout the patch depth. Once you’ve achieved proper consolidation, cold patch materials allow immediate traffic use without extended curing periods.
Install a Protective Border to Stabilize Edges
Protective borders serve as the final defense against recurring edge deterioration, transforming vulnerable driveway perimeters into reinforced structural boundaries. You’ll find that paver edging installation offers moderate difficulty with costs between $3 and $6 per square foot, providing slip-resistant surfaces that complement asphalt driveways effectively.
For climates experiencing freeze-thaw cycles, consider polymodified concrete edge solutions enhanced with fibers and non-porous aggregates. This formula withstands vehicle traffic while allowing water permeation, preventing the soaking damage that destroys plain concrete alternatives.
Metal edge restraint systems deliver excellent corner performance without cracking. You’ll install stakes at 60-degree angles through every second or third opening, creating spike angles that resist upward movement during temperature fluctuations. Belgian blocks work best in harsh winter regions, requiring $10 to $20 per square foot but demanding minimal maintenance afterward.
Seal the Repaired Edges to Prevent Future Damage
Once you’ve installed your protective border, sealing the repaired edges becomes critical for long-term durability and weather resistance. Before application, guarantee all repairs have fully cured and the surface is completely dry to prevent sealant failure.
When you compare durability of different sealer types, consider these factors:
- Asphalt-based sealers provide superior protection against oil and gas penetration at vulnerable edge areas.
- Acrylic sealers deliver essential UV protection for concrete driveways exposed to direct sunlight.
- Fast-drying formulations minimize downtime, allowing vehicle access within hours.
Review sealer application techniques before starting, apply thin coats from the highest point downward, using a brush for detailed edge work. Allow 4-8 hours curing between coats. Never apply thick single layers; multiple thin applications confirm proper adhesion and longevity.
Frequently Asked Questions
How Long Should I Wait Before Driving on Repaired Driveway Edges?
You’ll need to observe proper curing time of 48-72 hours for asphalt edge repairs before allowing vehicle traffic. For concrete repairs, wait a minimum of 7 days. As safe driving precautions, you should avoid driving directly on repaired edges during the initial curing phase since they’re more vulnerable to damage. Weather conditions, humidity, and pavement thickness can extend these timeframes, so adjust accordingly for ideal results.
Can I Repair Crumbling Driveway Edges in Cold or Rainy Weather?
You should avoid repairing crumbling driveway edges in cold or rainy weather whenever possible. Freezing temperatures compromise curing, while moisture washes away sealants before they bond properly. Unsealed edges remain vulnerable to freeze-thaw cycles, accelerating deterioration. Rain exacerbates inadequate drainage issues, allowing water to seep into cracks and weaken the base material. For ideal results, wait for dry conditions between 50-90°F with a 24-48 hour rain-free forecast before applying repair materials.
What Is the Average Cost to Repair Crumbling Driveway Edges Professionally?
You’ll typically pay $300 to $1,500 for professional crumbling edge repairs, depending on your driveway material and damage severity. Average hourly labor rates run $50 to $150, while typical material costs vary by substrate, asphalt patching ranges $100 to $400, and concrete work costs $100 to $1,000. Expect minimum service fees of $50 to $100 for contractor dispatch. Per-square-foot pricing generally falls between $3 to $8 for edge-specific restoration work.
How Often Should I Inspect My Driveway Edges for Early Damage Signs?
You should conduct regular visual inspections monthly to catch early edge deterioration before it escalates. Schedule seasonal maintenance checks during winter and summer when freeze-thaw cycles and UV exposure accelerate degradation. If you’re dealing with heavy vehicle traffic or harsh climate conditions, increase your assessment frequency to every two months. Look for small fissures, surface discoloration, and vegetation encroachment along borders, these indicators signal emerging structural compromise requiring prompt intervention.
Will Homeowner’s Insurance Cover Driveway Edge Repair Costs?
Your homeowner’s insurance typically covers driveway edge repair only when sudden, accidental events cause the damage, think fallen trees or storm impacts. Standard policies exclude gradual deterioration, normal wear, and maintenance-related issues like root damage. Insurance coverage limits and deductibles apply to approved claims. Note that home warranty policies generally don’t cover exterior concrete work either. You’ll want to document damage thoroughly and contact your adjuster promptly to determine coverage eligibility.