


To install a gravel driveway, you’ll start by mapping drainage with a 2% slope, then excavate 4-8 inches deep depending on traffic load. Next, you’ll build a compacted sub-base using crushed stone like MOT Type 1, add honeycomb gravel grids for stability, and layer your gravel from coarse to fine. Finish by compacting in lifts with a plate compactor. Each step below breaks down the technical details you’ll need.
Map Out Your Gravel Driveway for Proper Drainage
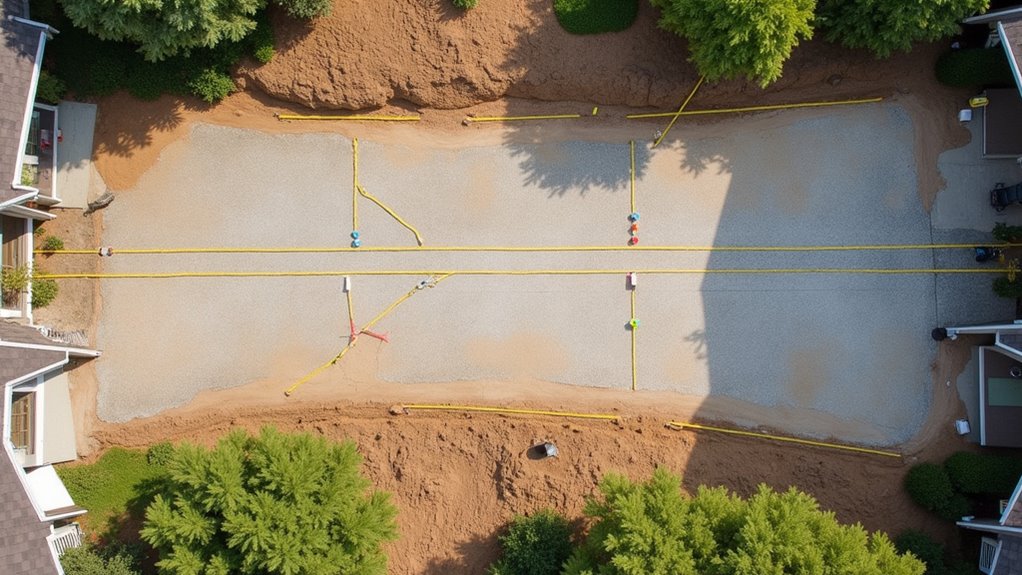
Before you order a single load of gravel, you’ll need to assess your site’s topography to guarantee water drains properly and doesn’t pool on your finished driveway. Start by measuring the slope using a level and measuring tape. For effective driveway grading, aim for a 2% drop per 100 feet, steep enough for drainage but gentle enough to prevent erosion.
During gravel driveway base preparation, shape your subgrade with a 2-3% crown from the centerline to the edges. This forces water off the surface before it saturates your layers. Include daylight drainage outlets every 100-200 feet along the route. When compacting gravel driveway sections, verify your grade with a straightedge to eliminate low spots where water collects. Without proper planning, water pools, erodes, and destabilizes the base with every storm, accelerating damage over time.
Excavate Your Driveway Site to the Right Depth
Once you’ve established proper drainage grades, excavation becomes your next critical task. For successful gravel driveway installation, you’ll need to determine the correct depth based on your expected traffic load. Once you’ve established proper drainage grades, excavation becomes your next critical task. When estimating gravel driveway cost, you’ll need to determine the correct depth based on your expected traffic load for successful gravel driveway installation.
| Usage Type | Recommended Depth |
|---|---|
| Light Residential | 4-6 inches |
| Standard with Pavers | 7 inches |
| Heavy Residential | 8+ inches |
When learning how to install a gravel driveway, start by removing all organic matter, roots, grass, and topsoil, before placing geotextile fabric. Excavate along string lines to maintain consistent depth and boundaries.
For layering gravel driveway construction, build embankments in small lifts of a few inches. Level each lift with a rake, then compact thoroughly before adding the next layer. This prevents future settling and structural failure. In areas with significant rainfall, stabilized gravel driveways may require a sub-base of 12-18 inches to ensure proper stormwater drainage and prevent water pooling.
Build a Solid Sub-Base With Crushed Stone
Your excavated driveway bed now needs a solid sub-base to prevent gravel from sinking into the soil and to distribute vehicle loads evenly. This layer provides the main load-bearing stability for your entire driveway system.
Choose your sub-base material based on drainage requirements:
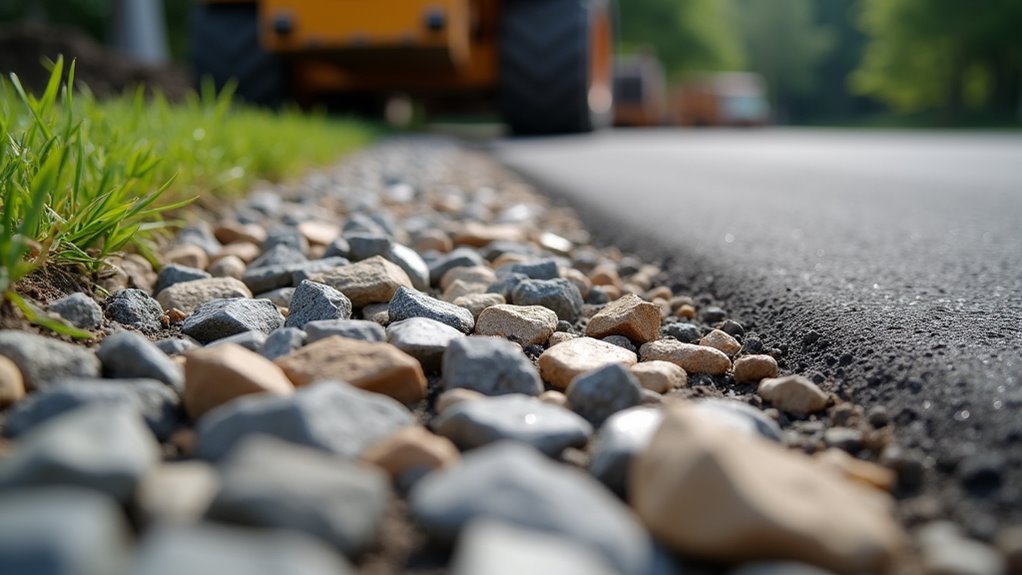
- MOT Type 1, Crushed concrete and rubble (dust to 40mm) delivers excellent compaction and strength
- MOT Type 3, Fewer fines allow freer drainage for SuDS-compliant installations
- #411 stone, Combines #57 stone with screenings for superior interlocking
- #3 crushed stone, Half-inch to 2-inch particles form strong 4-inch base layers
Install your sub-base in two 50-75mm lifts, compacting each with a vibrating roller. Vibrating rollers work by nudging particles into the most cohesive arrangement rather than simply squashing them down. You’ll need 100-150mm total depth, increasing to 12 inches minimum in clay soil areas.
Add Gravel Grids to Lock Everything in Place
Although your compacted sub-base provides solid support, gravel grids add the structural reinforcement needed to prevent shifting, rutting, and migration under vehicle traffic. These honeycomb-structured panels click together in a simple interlocking pattern, creating a unified system that disperses weight evenly across your driveway’s surface.
You’ll lay the grids directly onto your prepared substrate, connecting each panel until you’ve covered the entire area. The interlocking structure increases load-bearing capacity while maintaining a porous design that allows water to drain through naturally.
Made from UV-stable, rot-resistant recycled plastic, these grids withstand freeze-thaw cycles and extreme weather conditions. They’ll extend your driveway’s lifespan considerably compared to unsupported gravel installations. The Gravel Equivalent Factor means you can reduce your base layer by 4-6 inches for every inch of grid height.
Layer Your Gravel From Coarse to Fine

Because each gravel layer serves a distinct structural purpose, you’ll build your driveway from the ground up using progressively smaller materials. This approach guarantees proper load distribution, drainage, and surface stability. Because each gravel layer serves a distinct structural purpose, you’ll build your driveway from the ground up using progressively smaller materials. Understanding what is grading a gravel driveway helps ensure each layer is properly shaped and compacted. This approach guarantees proper load distribution, drainage, and surface stability.
Layering gravel from coarse to fine creates the foundation for a driveway that drains well and handles heavy loads.
Follow this layering sequence:
- Sub-base (150mm depth): Install MOT Type 1 or crushed stone #3 (1-2 inch angular rocks), compacting in 4-inch lifts with a plate compactor.
- Middle layer (4 inches): Add crushed stone #57 or #411 to fill voids and create a dense, binding interchange.
- Weed membrane: Lay heavy-duty polypropylene over the compacted base, pegging it securely.
- Top layer (50mm depth): Spread 14mm or 20mm angular gravel chippings, raking evenly for uniform coverage.
Compact each layer before adding the next. This prevents shifting and maintains structural integrity under vehicle weight.
Compact and Finish Your Gravel Driveway
How well you compact your gravel driveway determines whether it’ll hold up under vehicle traffic or shift and rut within months. Use a plate compactor for granular materials, working in 4-8 inch lifts for maximum density. Make overlapping passes at 30% coverage, moving systematically from edges across the surface. Keep the machine moving to avoid over-compacting single spots. How well you compact your gravel driveway determines whether it’ll hold up under vehicle traffic or shift and rut within months. As part of effective gravel driveway maintenance, use a plate compactor for granular materials, working in 4, 8 inch lifts for maximum density. Make overlapping passes at 30% coverage, moving systematically from edges across the surface. Keep the machine moving to avoid over-compacting single spots.
Before compacting, pre-wet dry gravel slightly to achieve ideal moisture content for particle interlocking. Compact each layer fully before adding the next.
After compaction, rake the surface smooth to level any dips. Install edging to contain gravel and prevent spreading. For quality assurance, inspect for uniform thickness and soft spots. Consider performing field density tests like sand cone or nuclear gauge methods.
Frequently Asked Questions
How Often Should I Add New Gravel to Maintain My Driveway?
You should add new gravel every 1-2 years for moderate-use driveways, or every 6 months in high-traffic or heavy rainfall areas. Watch for warning signs like visible ruts, potholes, water pooling, or soft spots under tires, these indicate you’ve waited too long. Rake monthly to redistribute displaced material, and compact any added gravel to restore surface integrity. Annual regrading alongside replenishment maintains proper drainage crown and extends your driveway’s lifespan.
Can I Install a Gravel Driveway Over an Existing Asphalt or Concrete Surface?
You can install gravel over existing asphalt or concrete, but it’s not ideal. Placing flexible gravel on a rigid base creates a structural mismatch that leads to instability and movement issues. If you proceed, add borders to contain the gravel and use 3-4 inches of #57 stone with a 2-inch layer of crushed material with fines underneath. This helps fill voids and improves compaction, though long-term performance remains compromised.
What Is the Average Cost per Square Foot for a Gravel Driveway Installation?
You’ll typically pay $1 to $10 per square foot for a gravel driveway installation, depending on gravel type, site conditions, and whether you hire professionals. Professional installation runs $1 to $3 per square foot for basic work, or $4 to $8 per square foot for full-service projects. DIY materials cost markedly less, but you’ll need to factor in equipment rental and your time for excavation, grading, and compaction.
How Do I Prevent Weeds From Growing Through My Gravel Driveway?
You’ll prevent weeds by layering defenses during installation. Start by applying glyphosate to kill existing vegetation, then lay ground covering before spreading gravel. Maintain a minimum 6-inch gravel depth to deprive weeds of nutrients. For ongoing control, use pre-emergent herbicides like Barricade seasonally and add fresh gravel every few years. You can also mix stone dust into your gravel to create a tighter surface that resists weed rooting.
Is a Permit Required to Install a Gravel Driveway in Residential Areas?
You’ll likely need a permit to install a gravel driveway, though requirements vary by municipality. Most areas require permits for new driveway construction or alterations, especially work involving public right-of-way like curb cuts or aprons. However, some localities like Cuyahoga Heights, OH prohibit gravel driveways entirely. Contact your local planning and zoning department before starting, they’ll specify permit requirements, application documents, fees, and any material restrictions for your specific location.